Hiking the Angels Landing Trail in Zion National Park (How to Get a Permit)
If you do one hike in Zion National Park, it should be this one! The Angels Landing trail is a stunning, though at times slightly terrifying, hike that requires navigating on narrow rock ledges, holding onto chains for support, and a little bit of scrambling. Though this hike isn’t recommended for people who are afraid of heights (unless you’re ready to tackle that fear), it’s a really rewarding, incredibly scenic, and super fun trail. This guide will tell you how to get an Angels Landing permit (everyone needs one now!), and everything you need to know about the hike so that you can decide if this adventure is right for you!
Head’s up: some of these links are affiliate links, so I get a commission if you make a purchase (at no cost to you). But that’s great, because I was going to share anyway, and this helps me keep making free guides for you!
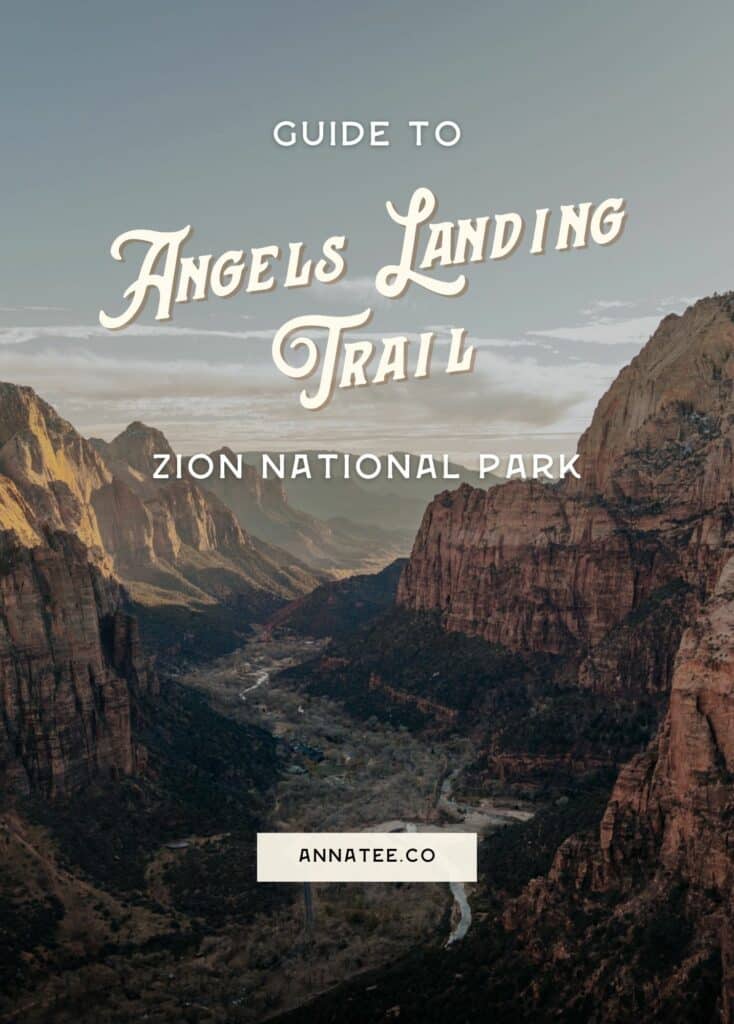
Table of Contents
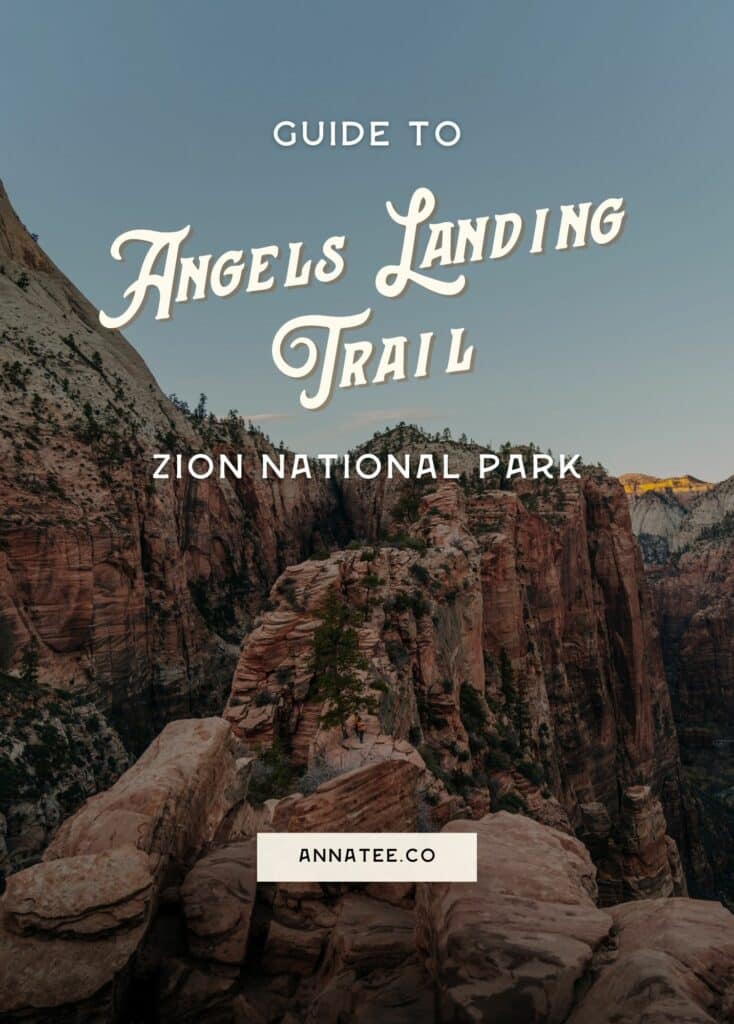
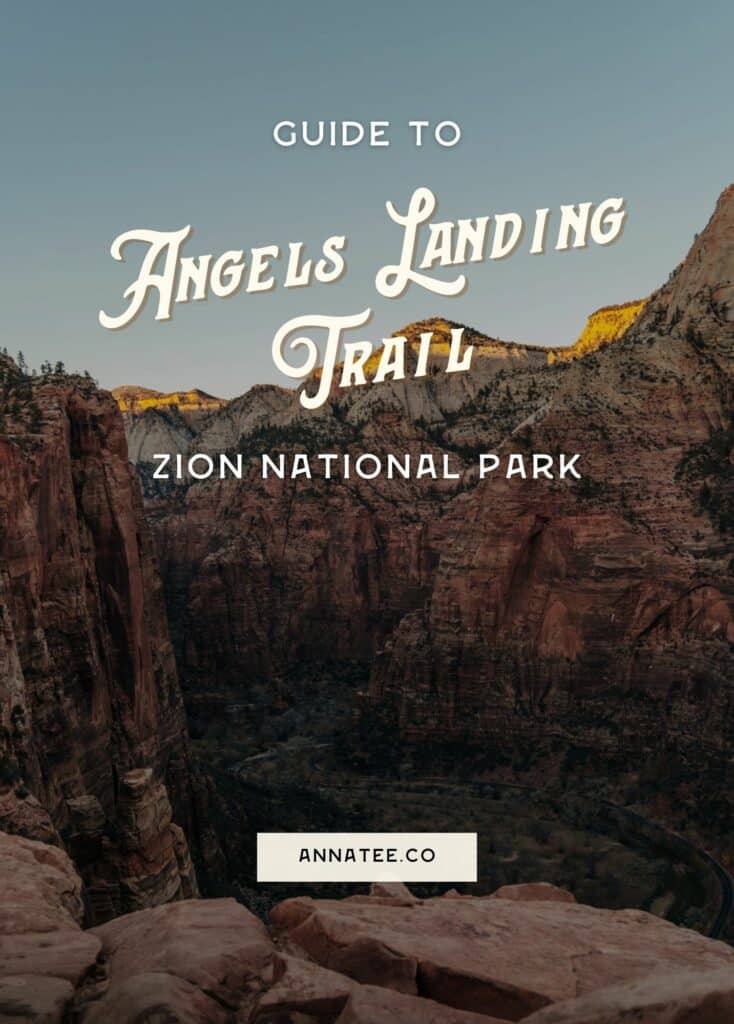
Pin this photo to save this Angels Landing Trail guide and reference it later!
About the Angels Landing Trail
Though I wouldn’t recommend the Angels Landing trail for anyone who’s a complete beginner hiker, it’s do-able for most people who have at least a little bit of experience. But, you need to be prepared! So, here’s what you need to know before you hit the trail.
Angels Landing Trail Stats
Length: 5.4 miles (8.7 km) out and back
Elevation Gain: 1488 feet (454 meters)
Difficulty: Hard
Hike Time: I consider myself to be an average hiker, and this trail took me 4 hours and 2 minutes, including taking a snack break at the top. You can check out my hike on Strava!
Leave No Trace on the Angels Landing Trail
Anytime you’re outdoors, it’s essential that you practice Leave No Trace (LNT). LNT is a set of seven principles that help us understand our impact on the outdoors – because while we usually have good intentions, the environment is more fragile than we think, and one snap-second decision can cause damage to the environment that will take the earth years, even decades to repair. This is a popular trail, so it’s really important to make sure it stays beautiful.
Leave No Trace means enjoying the outdoors without disrupting nature, as much as it’s possible to do so. Here are the 7 principles of LNT, and how they apply when you hike the Angels Landing trail!
- Plan ahead and prepare – read this guide, make sure you know have the right gear, and be prepared for the chain section. Get the necessary permit to prevent overcrowding and keep everyone safe!
- Travel and camp on durable surfaces – stay on the trail to avoid trampling grasses and plants.
- Dispose of waste properly – don’t leave trash, or anything else, behind. Pack it out!
- Leave what you find – I know it can be tempting to take a cool rock or leaf, but leave these things where they belong! Animals often use these, and if everyone takes one, the trail won’t be as pretty.
- Minimize campfire impacts – no campfires are allowed on the trail.
- Respect wildlife – don’t approach wild animals, and never feed them. It’s really bad for their stomachs, and can cause them to lose their ability to find their own food, which will kill them when winter comes and no one is around to feed them.
- Be considerate of other visitors – yield to other hikers, and be respectful – no speakers or loud music.
The Best Time to Hike the Angels Landing Trail
You can hike the Angels Landing trail any time of year, but I recommend going during the off season. Busy season in Zion National Park is March through the end of November – during this time you have to take the shuttle around the park, rather than driving. Winter can be a tough time to hike Angles Landing, because of snow, wind, and cold weather, but if you plan your hike for just before or just after the busy season, you’ll enjoy good weather, fewer people, and it’ll be easier to get a permit!
I recommend hiking in early March or late November, but be sure to check the weather. The trail can be really dangerous in bad weather, so make sure to plan accordingly.
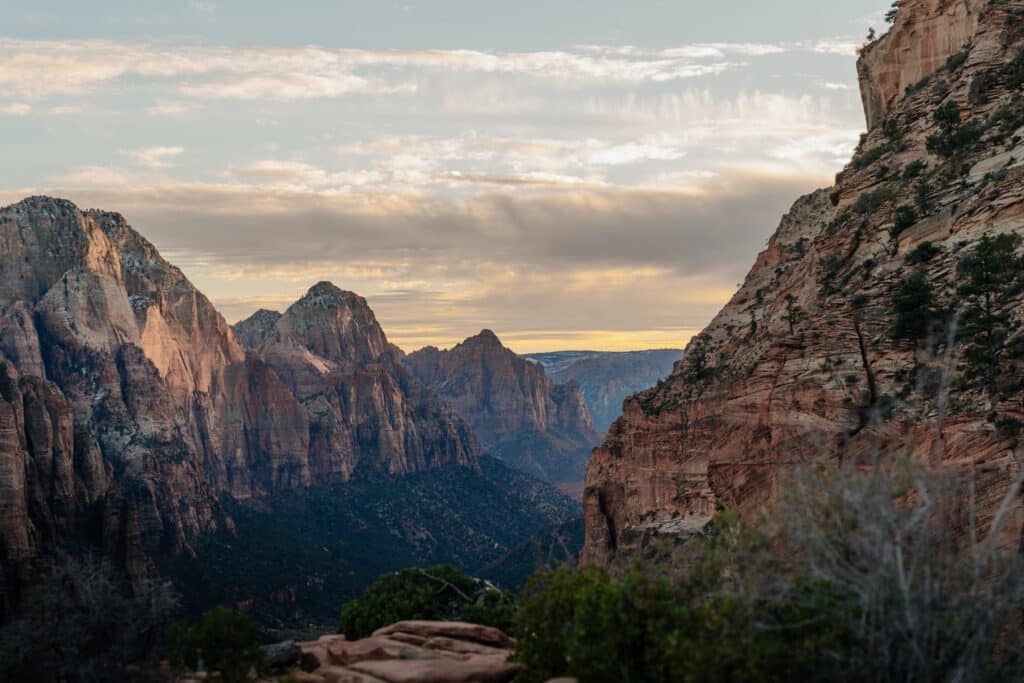
This is a popular trail, and though the permit system helps a lot, the best time of day to hike the trail is sunrise or sunset! This gives you incredible views at the summit, and there will be fewer people around. Bring a headlamp if you plan to hike down in the dark!
Angels Landing Permits
Due to how popular the Angels Landing trail is, there is now a permit system in place to prevent overcrowding and damage to the trail.
Do You Need a Permit to Hike Angels Landing?
Everyone who hikes Angels Landing needs a permit. No exceptions, no matter what time of year you go! Without a permit, you can go to Scout’s Lookout, but can’t continue on to the chain section of Angels Landing.
I know it can feel frustrating to need a permit to go on a hike, but permits are really important, and there are a few reasons why.
- When places become really popular, the environment sees a lot of damage. More people means a bigger impact on nature, and more damage to the trail. Limiting the number of people helps prevent this!
- Angels Landing requires navigating along a ridge while holding onto a single chain. Some sections are really narrow, and it can be really dangerous when a lot of people are there at the same time – people have died here. Too many people means no room to pass, and it’s just unsafe.
How to Get an Angels Landing Permit
There are two ways to get an Angels Landing permit – you can enter the seasonal lottery, and secure your permit in advance, or apply the day before.
Seasonal Permits
There are four lotteries for seasonal permits.
- Winter (December 1st – February 29th)
- Spring (March 1st – May 31)
- Summer (June 1st – August 31)
- Fall (September 1st – November 30th)
The lottery for each season opens two months before – so for winter, it opens on October 1st, for spring it opens on January 1st, and so on. Each lottery stays open until the 20th of the starting month, so you’ll need to enter on Recreation.gov. You’ll be able to choose the dates you’re applying for, and you’ll get an email on the 25th of the month you apply letting you know whether or not you were accepted. There is a $6 application fee, and if you get the permit, you’ll be charged an additional $3 per person.
Day Before Permits
You can also apply for an Angels Landing permit the day before you want to hike. Each day, the lottery opens from 12:01 am to 3 pm MT. Go to Recreation.gov (make sure you’re on the page for the season you’re applying in – Winter, Spring, Summer, Fall), and you’ll be able to register for the lottery. It doesn’t matter what time you apply – the lottery is random, not first come first serve. You’ll get an email at 4 pm letting you know if you got a permit. There is a $6 application fee, and if you get the permit, you’ll be charged an additional $3 per person.
I got my day before permit on my first try, but it may be more difficult during popular times of year. I applied for the day after shuttle service ended (which signals the end of busy season), and I was also only applying for one person, which likely made it easier for me.
Don’t Forget Your Pass!
Because the Angels trail is located in Zion National Park, you will need a pass to hike. It costs $35 per car, but if you visit national parks often (or at least more than twice a year), I recommend getting an America the Beautiful Pass! It’s an annual pass that will get you into every national park in the country for an entire year, for just $80.
You can purchase either pass on your way into the park, or get an America the Beautiful pass online ahead of time!
What to Bring to Hike the Angels Landing Trail
When you hike the Angels Landing trail, here’s what you’ll need to bring!
- Hiking Shoes – make sure you’ve got something with grip, as some of the rocks are slippery. I prefer hiking in sandals and wore my Chacos for this hike, but boots are a good idea for more ankle support. I love my Danner boots – and they come in men’s and women’s.
- Layers – it’s going to be colder at the Angels Landing summit, so a lightweight windbreaker or a fleece is a good idea. If you’re hiking in winter or for sunrise or sunset, I love my Columbia puffy jacket – it’s lightweight, and water resistant!
- Backpack – you’ll need a backpack for water and snacks. I use an Osprey Hikelite 26L.
- Headlamp – Angels Landing is extra wonderful at sunset, but bring a headlamp to get back safely after dark.
- Gloves – gloves can be really nice for the chains section. I didn’t have any and was fine, but they can be helpful for grip.
- Hiking poles – the hike is steep, so if you have knee pain going downhill, poles help a lot with that!
- Water – water is a must, always. This hike is steep, so I’d recommend bringing an extra water bottle. I brought my 2L hydration pack and drank the whole thing!
Bonus Tip: A lot of these links are for my favorite place to buy outdoor gear – Backcountry. If you install the free Lolli extension on your browser, you can earn free Bitcoin when you shop online at certain retailers, including Backcountry. You can transfer it to a crypto wallet, or just cash out to your bank account.
How to Get to the Angels Landing Trail
If you’re flying in to explore the park, most people fly into the Harry Reid International Airport in Las Vegas. From there, it’s a 3 hour drive to Zion National Park. There is also the St. George Regional Airport in St. George, Utah, which is smaller, but you can usually get there with a layover.
Expedia is a good way to find flights and rental cars, I also super recommend signing up for Going (formerly Scott’s Cheap Flights) – they send you amazing deals, so you can find cheap flights to Vegas, and to destinations all over the world. The free account is great and totally worth the few minutes it takes to sign up, and I do recommend the premium account too!
Taking a Shuttle to Angels Landing
If you don’t want to rent a car, there is an option for exploring Zion National Park with public transportation. You’ll need to take a rideshare to the town of Springdale, and once you’re there, Springdale has a free shuttle that can take you to the visitor’s center!
Once you’re in the park, you’ll take the park shuttle. Be aware that it only runs during the busy season, usually from the beginning of March through the end of November, as well as at the end of December for the holiday season. Take this shuttle to Stop #6 (The Grotto), and this is where the hike Angel’s Landing begins.
Driving to Angels Landing
You can also drive into Zion National Park. If you fly in to explore, you can rent a car through Discover Cars or Rental Cars. But, a great alternative to a rental car is a tiny home on wheels! With a camper van, you get a vehicle and a place to sleep, all in one! This is my favorite way to travel, and you can rent a fully decked out van with Escape Campervans. Another option for vans is to use Outdoorsy, which is more like Airbnb for campers – you can rent a van, RV, or trailer from a person in the area.
To get to the park, you’ll take Highway 9 north from Springdale, which will take you right into the park. Once you enter, keep driving straight and park at The Grotto. Parking fills up fast, so if you can’t park there, you can park at the Zion National Park Lodge, which is an additional half mile away from the trailhead.
One thing to note if you drive into the park – when the shuttle is running, private vehicles are not allowed on Zion Canyon Scenic Drive, which is where the Angels Landing trail begins. If you visit during the busy season when the shuttle is running, you can park your car at the visitor center – I would definitely recommend getting there early in the day, as parking fills up quickly and lines for the shuttle can get very long. Take the shuttle to Stop #6 (The Grotto), and this is where the hike Angel’s Landing begins.
Angels Landing Trailhead Coordinates: 37.2591,-112.95122
Do a Guided Hike to Angels Landing
Another option for doing this trail is with a guided hike! This can be nice as they’ll provide a permit for you, and can give you information about the geology and history of the area while you hike. If you’re nervous about hiking on your own, a guided hike is a great option! This group meets at the visitor’s center in the park.
Hiking the Angels Landing Trail
Once you’ve parked and are ready to start hiking, here’s what you can expect on the Angels Landing trail!
Angels Landing Trailhead
Whether you parked at The Grotto or took the shuttle there, the hike begins across the street from the bathroom. The trail is easy to spot, with a sign marking the beginning. You’ll cross a bridge over the river, and find yourself at the junction of a few trails. A sign will point you towards Angel’s Landing!
Trailhead to Scout Lookout
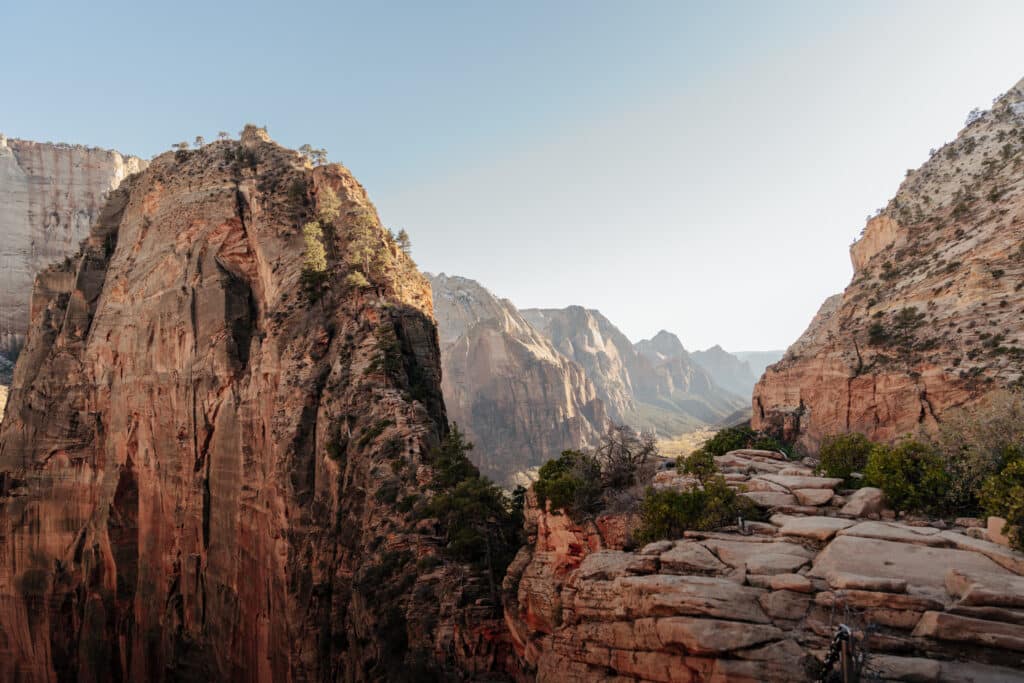
You don’t need a permit for this first section of the trail, which takes you to Scout Lookout, a beautiful view of the canyon right before the chains section of Angel’s Landing begins.
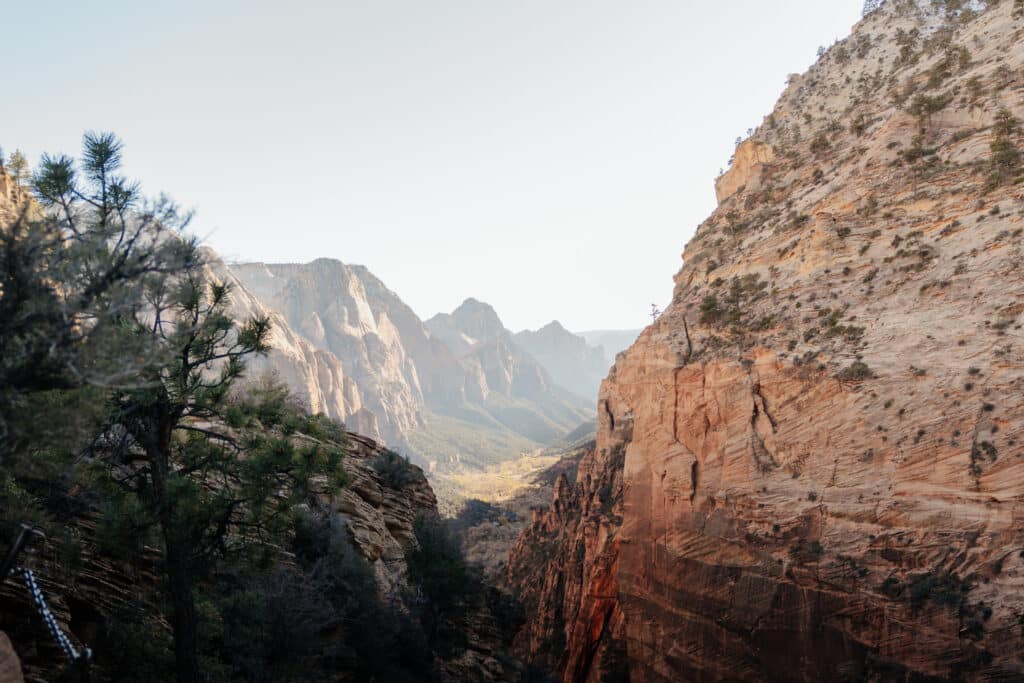
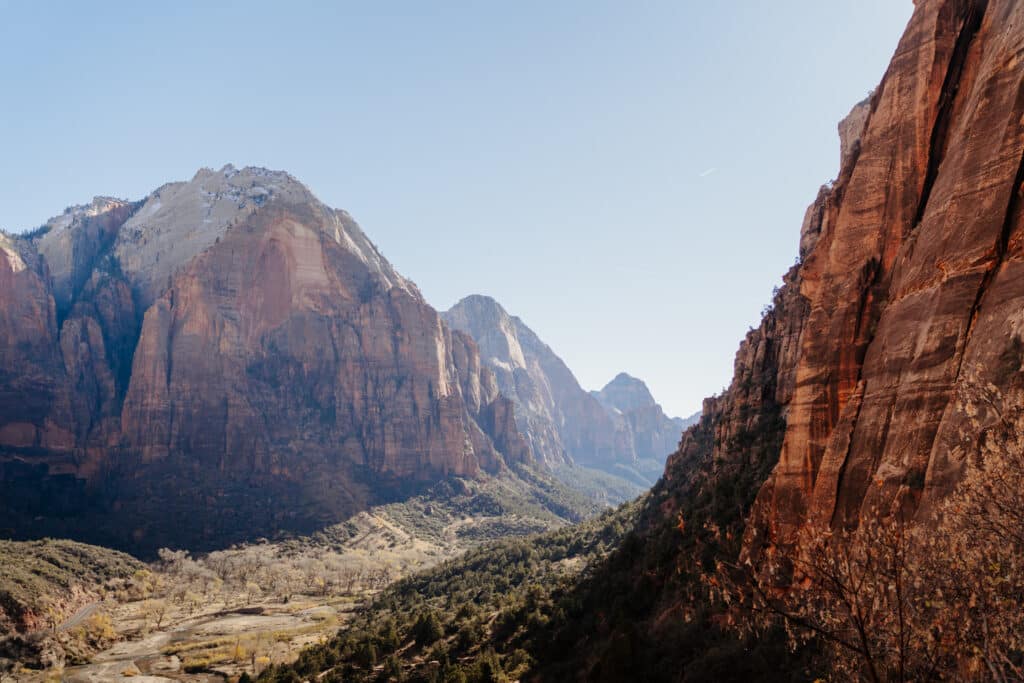
The hike starts out flat, taking you along the river, with beautiful views of the valley and the towering cliffs of Zion already opening up in front of view. The flat portion doesn’t last very long though, and soon you’ll start ascending up the steep switchbacks.

The path is mostly paved, and the trail is pretty consistently steep, and very sunny for a while, until you get to Refrigerator Canyon, which offers some shade. Once you get past the chilly canyon, you’ll soon reach Walter’s Wiggles, a set of 21 short switchbacks. Once you’re done with these, you’re very close to Scout Lookout, and the beginning of the infamous ascent up the chains to Angel’s Landing.
Scout Lookout to Angels Landing
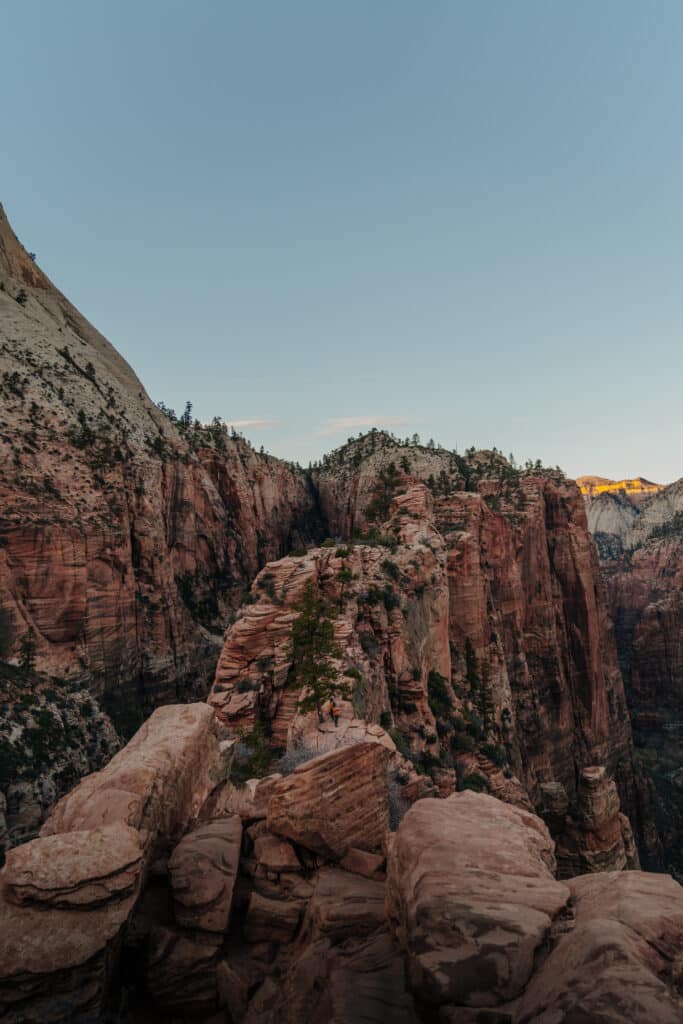
As long as you have your permit (a ranger checked mine here), you can continue up to Angels Landing. This section of the trail is famous for being pretty intense – you’ll be ascending up on a rocky cliff that’s often only wide enough for one person to pass. There’s a metal chain to hold on to as you climb, but this section would be pretty tough if you’re afraid of heights.
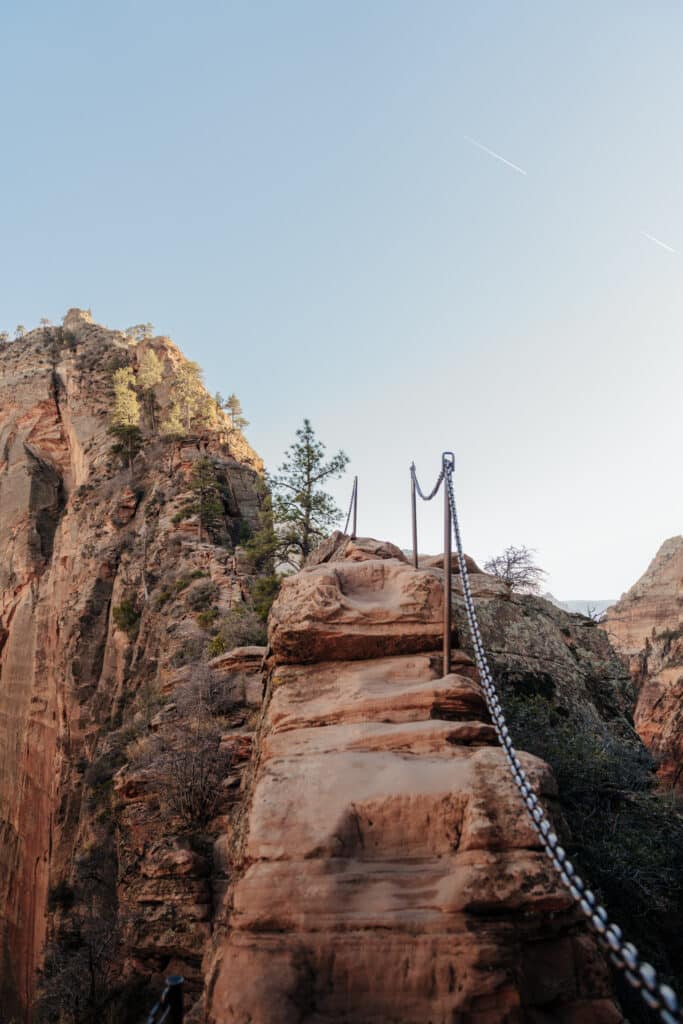
This section of the trail is half a mile long (0.8 km), but it felt like it took a long time, since you have to be careful about where you step and watch your footing the entire time.
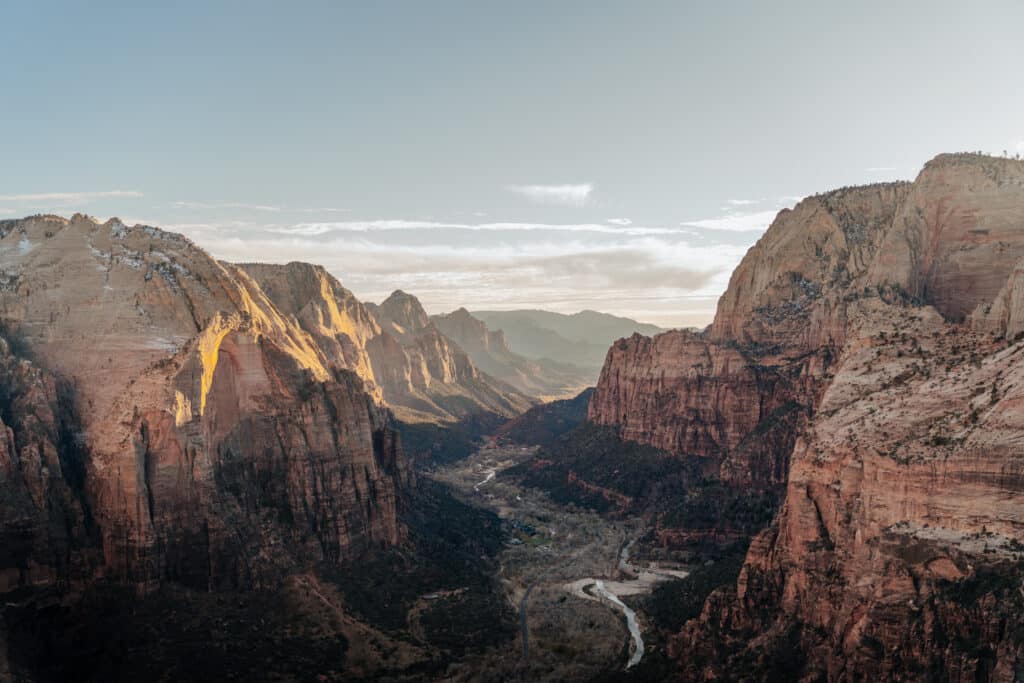
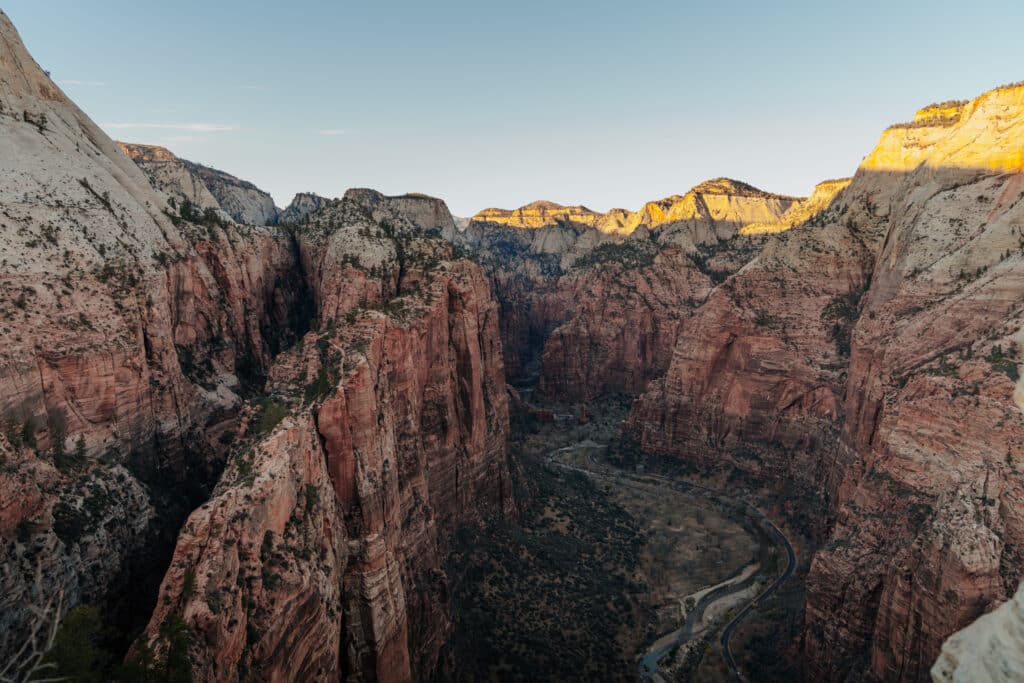
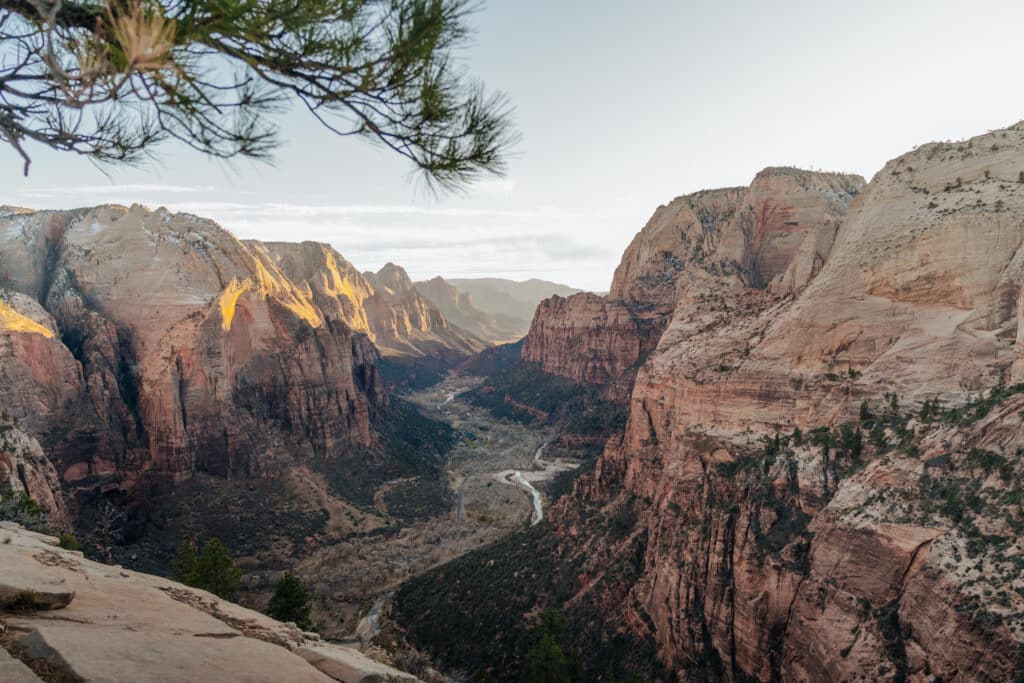
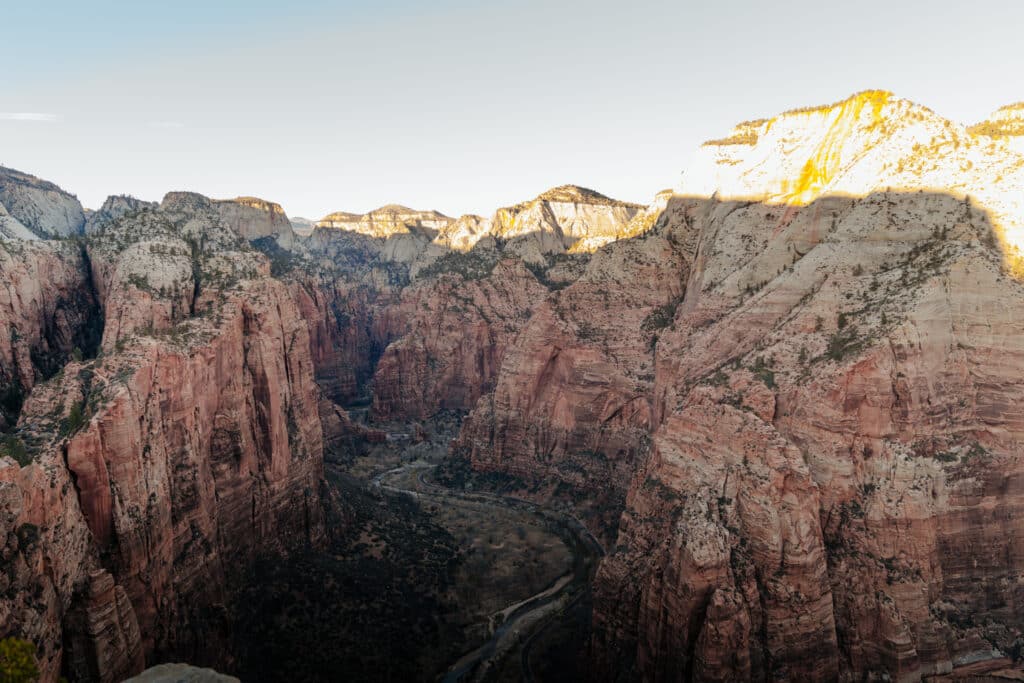
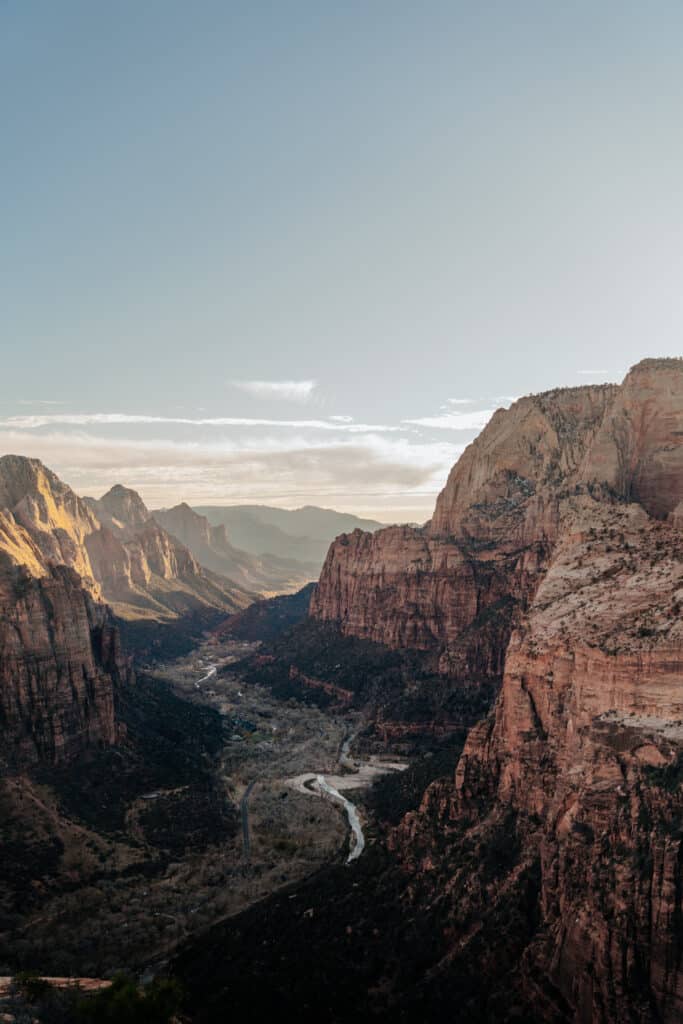
Soon enough, though, you’ll be at the top! The view of Zion National Park is truly breathtaking and completely worth the trek.
Back to the Trailhead
Once you’re done enjoying the view, it’s time to go back the way you came! Trail etiquette says to yield to uphill hikers, but as you go down the chains, there are some places where it might be more convenient for you to “pull over” and stop than for someone coming the other way, so be mindful of other hikers!
Where to Stay Near the Angels Landing Trail
You can turn your hike into a little getaway, and stay somewhere close by! Here are my favorite options for places to stay close to this area of Zion National Park.
Glamping, Cabins, & Yurts
For a unique place to stay during your trip, check out Hipcamp! It’s like Airbnb for campsites – and you can find yurts, cabins, glamping sites, and more. There’s a unique spot right outside of the park called Under Canvas, which offer unique glamping tents to stay in!
You can even get $10 off your first booking here!

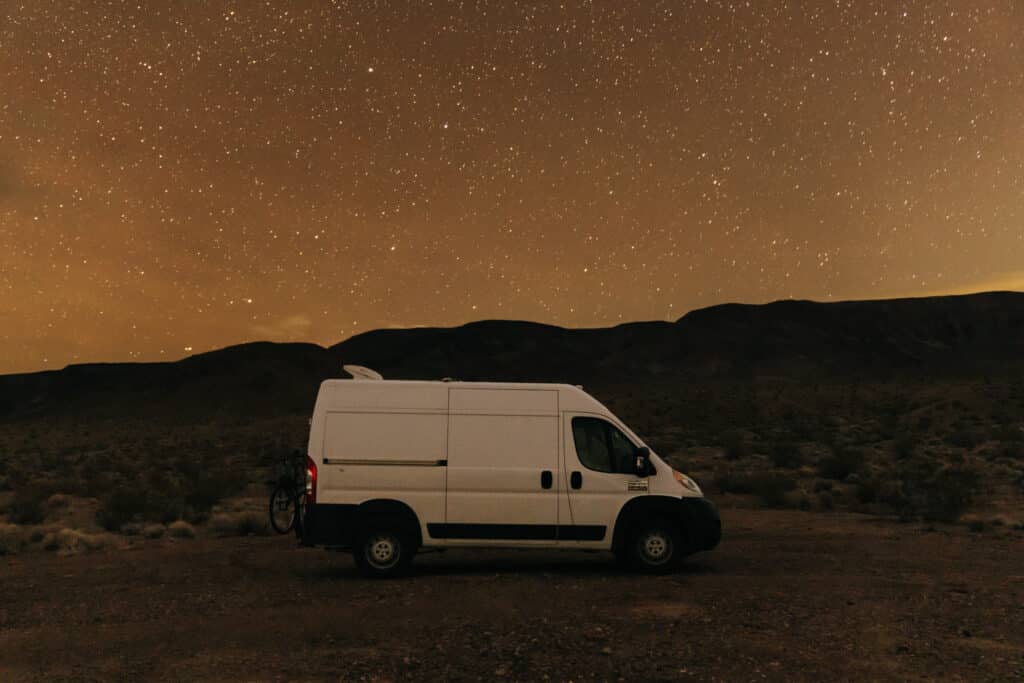
A Camper van
With a camper van, you get a vehicle and a place to sleep, all in one! This is my favorite way to travel, and you can rent a fully decked out van with Escape Campervans. Another option is to use Outdoorsy, which is more like Airbnb – you can rent vans, RVs, and trailers from people who live nearby!
Find a Campsite
Whether you car camp, tent camp, or rent a tiny home on wheels, The Dyrt is the best way to find campsites! There are campgrounds in the national park, as well as plenty of BLM land surrounding it – which means you can camp for free!
There are lots options for free camping near the trail – for tips on finding the best ones, check out this guide.
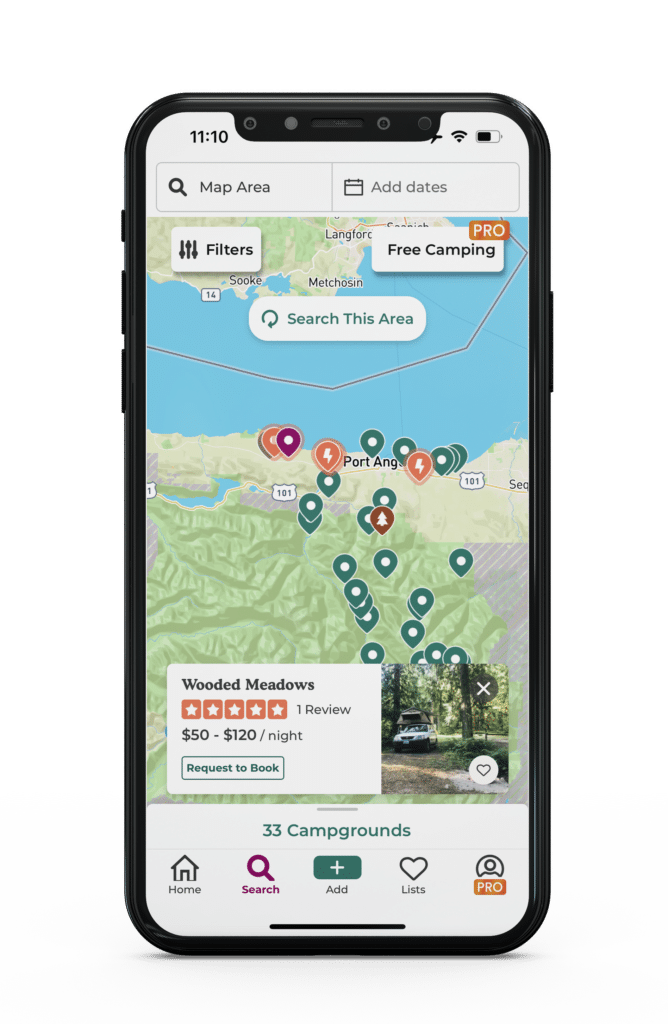
Try the Dirt Pro
Free for 30 days
Find campsites, plan road trips, and see the boundaries of national forest land where you can camp for free!
Lodges & Hotels
There are also plenty of hotels and vacation rentals just outside the park. Springdale is the nearest town, with lodging options like the Zion Park Motel. Virgin, Utah is also just a short drive away, and has some unique places to stay – like Autocamp, where you can stay in a unique Airstream!
Booking.com is a great place to find lodging, and for more options, check out this map of places to stay. Make sure to change the dates, and zoom out to see all of your options!
Booking.comMore Adventures Near the Angels Landing Trail
Have you hiked this trail, or are you adding it to your bucket list? Let me know in a comment below!
For more adventures, check out Valley of Fire State Park, not too far away in Nevada!
For more US national parks, check out these guides:
Pin any of these photos to save this guide to the Angels Landing Trail for later!