How to Backpack the Hoh River Trail to Blue Glacier
The Hoh River Trail to Blue Glacier is one of the absolute best hikes in Olympic National Park, and an incredible backpacking adventure. The trail takes you through Washington’s lush temperate rainforest, and ends at a really stunning view of the glacier. But, the trail is 17 miles long – so it’s best as a backpacking adventure, and you’ll need to be prepared! This guide will tell you how to backpack the Hoh River Trail to Blue Glacier – the best campsites, getting a permit, and what to expect on the trail.
Head’s up: some of these links are affiliate links, so I get a commission if you make a purchase (at no cost to you). But that’s great, because I was going to share anyway, and this helps me keep making free guides for you!
Pin this photo to save this Guide to Backpacking the Hoh River Trail to Blue Glacier and reference it later!
Table of Contents
About the Hoh River Trail to Blue Glacier
The Hoh River Trail to Blue Glacier is a great backpacking trip for beginners who have done a few shorter, one night trips and are ready to try something longer! It’s flat for about 13 miles before becoming steep up to Blue Glacier, so while the trail is long, it’s not terribly strenuous.
Hoh River Trail to Blue Glacier Stats
Length: 35.1 miles (56.5 km) out and back
Elevation Gain: 5656 feet (1723 m)
Difficulty: Moderate
Number of Days: I recommend a minimum of 3 days, 2 nights for this hike. But, I did it in 4 days, 3 nights and that was ideal for me. You can check out my hike on Strava: Day 1, Day 2, Day 3, Day 4
Leave No Trace
Anytime you’re outdoors, it’s essential that you practice Leave No Trace (LNT). LNT is a set of seven principles that help us understand our impact on the outdoors – because while we usually have good intentions, the environment is more fragile than we think, and one snap-second decision can cause damage to the environment that will take the earth years, even decades to repair.
Leave No Trace means enjoying the outdoors without disrupting nature, as much as it’s possible to do so. Here are the 7 principles of LNT, and how they apply when you hike the Hoh River Trail to Blue Glacier!
- Plan ahead and prepare – read this guide, make sure you know have the right gear, and be prepared for any weather. Know how to read tide charts!!
- Travel and camp on durable surfaces – stay on the trail to avoid trampling grasses and plants!
- Dispose of waste properly – don’t leave trash, or anything else, behind. Pack it out! There are bathrooms at two of the campsites, but bring a trowel just in case, and pack out your toilet paper if you need to use it on trail.
- Leave what you find – I know it can be tempting to take a cool rock or leaf, but leave these things where they belong! Animals often use these, and if everyone takes one, the trail won’t be as pretty.
- Minimize campfire impacts – fires are allowed at lower elevation sites (as long as there isn’t a burn ban!), but not above the Martin Creek campsites.
- Respect wildlife – don’t approach wild animals, and never feed them. It’s bad for their stomachs, causes aggression, and messes with their natural patterns.
- Be considerate of other visitors – yield to uphill hikers, and be respectful – no speakers or loud music.

The Best Time to Backpack the Hoh River Trail to Blue Glacier
The best time to hike this trail is usually late June through September. Early in the summer, you might still run into snow close to the glacier. I hiked this trail in early July of 2023, and there was a patch of snow above Glacier Meadows – but it was small and totally fine, even though I was hiking in sandals.
But, regardless of when you hike, you should be prepared for rain. The Hoh Rainforest is a temperate rainforest, which means it rains, a lot! Bring a rain jacket and have a pack cover or a liner for your backpack.
Don’t Forget Your Pass!
Because the Hoh River Trail to Blue Glacier is located in Olympic National Park, you will need a pass to park your car. It costs $30 per car, but if you visit national parks often (or at least more than twice a year), I recommend getting an America the Beautiful Pass! It’s an annual pass that will get you into every national park in the country for an entire year, for just $80.
You have to go a little out of the way to buy a pass in the park, so I recommend getting your America the Beautiful pass online ahead of time!
Campsites on the Hoh River Trail to Blue Glacier
When you’re backpacking the Hoh River Trail to Blue Glacier, you’ll need to get a permit – and you’ll need to select the campsites you’ll be staying at.
There are a lot of campsites to choose from along this trail: Tom Creek (2.8 mi from trailhead), Five Mile Island (5 mi), Happy Four (5.6 mi), Olympus Guard Station (9 mi), Lewis Meadow (10.5 mi), Elk Lake (14.6 mi), and Glacier Meadows (16.6 mi). There are a also places where you can dispersed camp on the gravel bar of the Hoh River.
Lewis Meadow and Glacier Meadows tend to be the most popular options! I stayed at Lewis Meadow the first night, Glacier Meadows the second night, and Lewis Meadow again the third night. This separated the miles nicely, and on the third day I left my campsite and pack at Glacier Meadows to hike the remaining mile to Blue Glacier without my big backpack – then came back down, packed up, and hiked back to Lewis Meadow.
Some people choose to camp at Lewis Meadow, then leave their packs there and take a day trip up to Blue Glacier and back to the campsite – this is a pretty long trip, but it lets you hike without extra weight.
How to Get a Backpacking Permit
Along with the national park pass (which you’ll leave in your car at the trailhead), you also need a permit to backpack the Hoh River Trail to Blue Glaicer. It’s a must if you’re staying overnight!
The permit is pretty easy to get – though it gets busy, so you will most likely be able to get a permit even if you’re planning this trip kind of last minute. Go to Recreation.gov, and you’ll see a page for Olympic National Park wilderness permits. Head over to the “check availability” button, and you’ll need to select a starting area.
Select “Hoh,” choose the number of group members, and put in the date you want to go. You’ll need to select your campsites – Lewis Meadow and Glacier Meadows are the best options, in my opinion.
Select your dates, click “Book Now,” and then you’ll be asked for more information.
Note: You will be asked to choose where you’ll pick up your permit, but it’s no longer required to pick it up in person. The park now allows you to print the permit yourself.s.
The permit costs $8 per person per night, plus a $6 flat reservation fee, so it cost me $30 for one person for three nights.
What to Bring to Backpack the Hoh River Trail to Blue Glacier
When you backpack the Hoh River Trail to Blue Glacier, here’s what you’ll need to bring!
- Tent – somewhere to sleep! I love my super light Big Agnes Tiger Wall tent, and I also use a footprint to keep the bottom safe & dry.
- Sleeping Bag – make sure you have something warm enough! I use this ALPS Mountaineering sleeping bag.
- Sleeping Pad – an essential for a comfy night of sleep! I have this Sea to Summit pad, but am planning to upgrade to a thicker one, like this Therm-a-Rest pad soon!
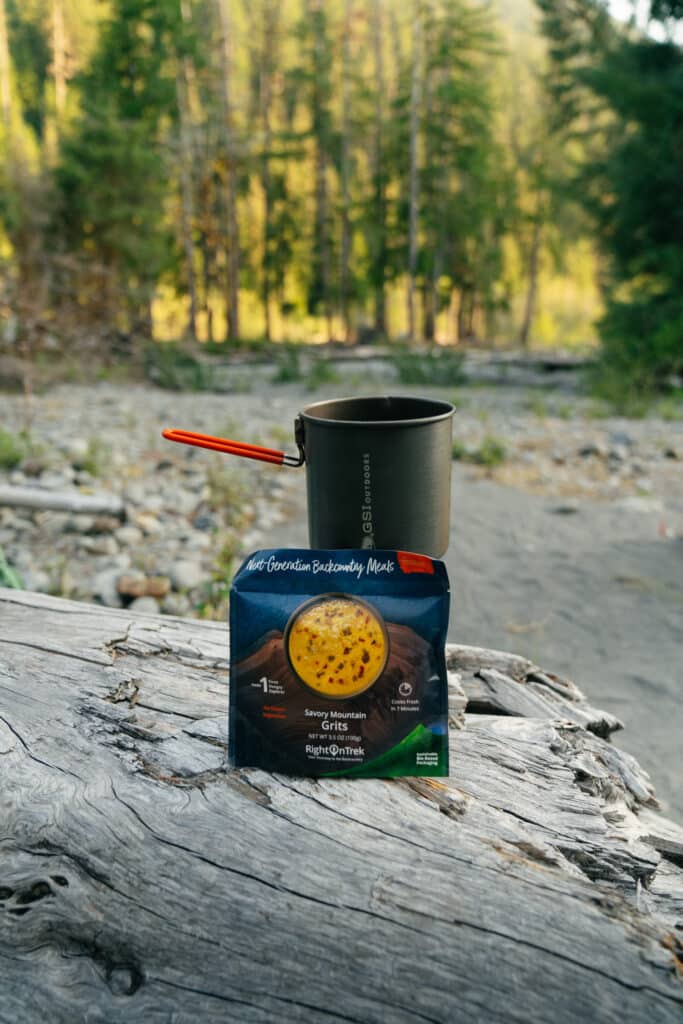
- Camp Stove – there’s nothing like having a hot meal at camp. I use an MSR Pocket Rocket stove, which is incredibly small, along with this GSI Cookset.
- Food Storage – on this hike, food is required to be stored in a bear safe way. Many of the campsites have bear wire, so if you plan to hang your food, make sure you have a waterproof bag in case of rain. Alternatively, you can keep your food in a bear canister.
- Hiking Shoes – parts of this trail are steep and sketchy, and often muddy from frequent rain, so make sure you’ve got something with grip. I prefer hiking in sandals and wore my Chacos for this one, but if you usually hike in boots, I like my Danner boots for when I want more ankle support.
- Layers – you should always bring a rain jacket on the Olympic Peninsula! I like my Marmot PreCip a lot for wind and rain, and if it’s going to be cold, make sure you have a puffy as well.
- Backpack – you’ll need a backpack to carry everything! I use a Deuter backpacking pack.
- Headlamp – a backpacking essential for after dark.
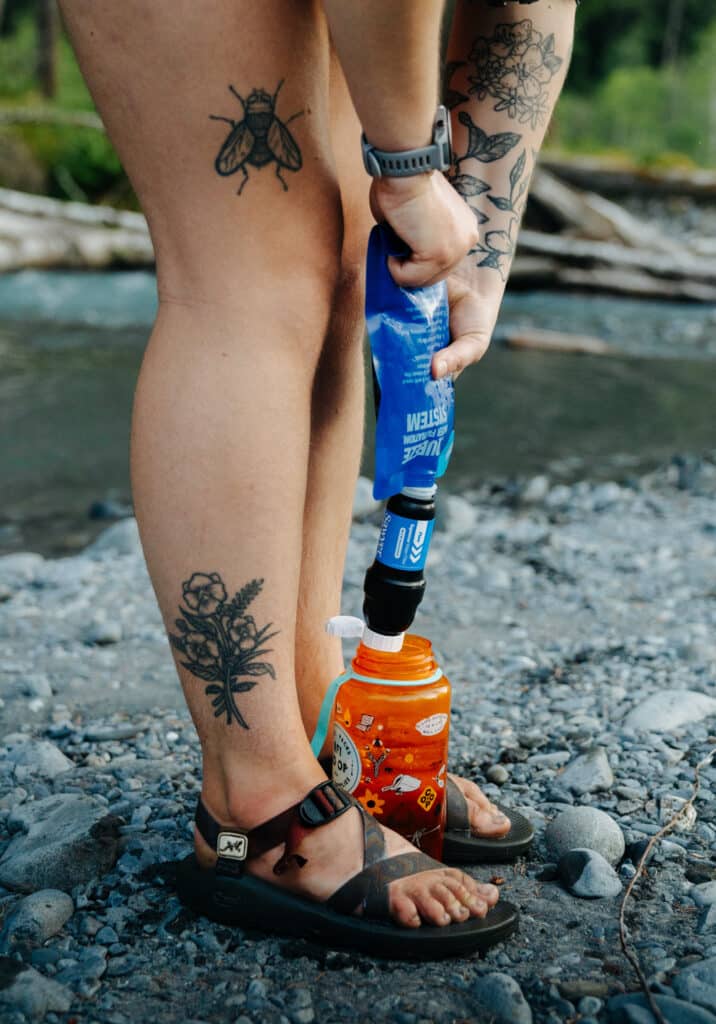
- Water – fresh water is easy to find on this trail, as there are lots of streams. Make sure you have a water bottle and a filter to get clean water. I love my Sawyer Squeeze!
Bonus Tip: A lot of these links are for my favorite place to buy outdoor gear – Backcountry. If you install the free Lolli extension on your browser, you can earn free Bitcoin when you shop online at certain retailers, including Backcountry. You can transfer it to a crypto wallet, or just cash out to your bank account.
Directions to the Hoh River Trailhead
If you’re flying in to Washington to explore the park, the closest airport is SeaTac, in Seattle.
Expedia is a good way to find flights and rental cars, I also super recommend signing up for Going (formerly Scott’s Cheap Flights) – they send you amazing deals, so you can find cheap flights to Seattle, and to destinations all over the world. The free account is great and totally worth the few minutes it takes to sign up, and I do recommend the premium account too!
If you fly into Washington, you can rent a car through Discover Cars or Rental Cars. But, a great alternative to a rental car is a tiny home on wheels! With a camper van, you get a vehicle and a place to sleep, all in one! This is my favorite way to travel, and you can rent a fully decked out van with Escape Campervans. Another option for vans is to use Outdoorsy, which is more like Airbnb for campers – you can rent a van, RV, or trailer from a person in the area.
From Seattle, you can either take the ferry (a fun experience if you aren’t from here!) to Bainbridge Island and keep driving from there to get to the Olympic Peninsula, or drive south towards Tacoma from Seattle.
To get to the trailhead, it’s slightly faster to drive south through Montesano, but you can also go north to stop in Port Angeles and Forks. From Highway 101, you’ll turn onto Upper Hoh Road, and continue through the entrance station and to the parking lot.
Hoh River Trailhead Coordinates: 47.8601876, -123.9348067
One important thing to note is that in the summer, the wait to enter the park can be really long. The Hoh parking lot is kind of small, so they will have you wait at the entrance until a car leaves! The best way to avoid waiting is to get there early in the morning, or late in the evening. From around 10 am to 5 pm, you can expect delays of up to an hour and a half.
Hoh River Trail to Blue Glacier Itinerary & Breakdown
I backpacked the Hoh River Trail to Blue Glacier over 3 nights, 4 days – here’s the itinerary I followed, and an overview of what you can expect on the hike!
Day 1: Trailhead to Lewis Meadow
Distance: 10.5 miles (17.9 km)
Hike Time: I consider myself an average hiker, and this portion took me 5 hours and 51 minutes. Check it out on Strava!
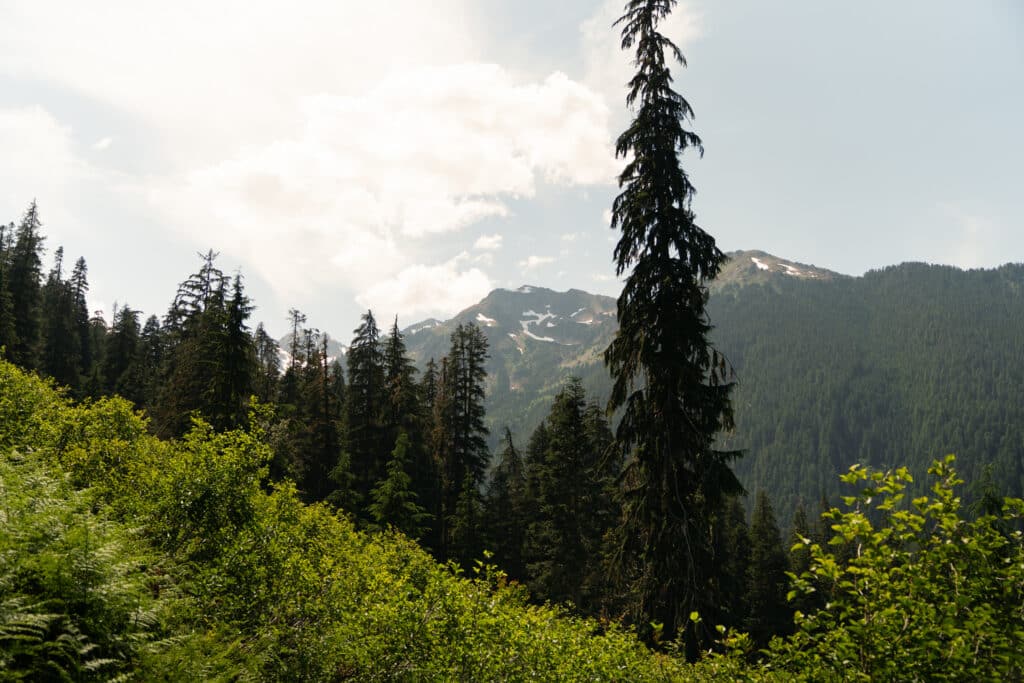
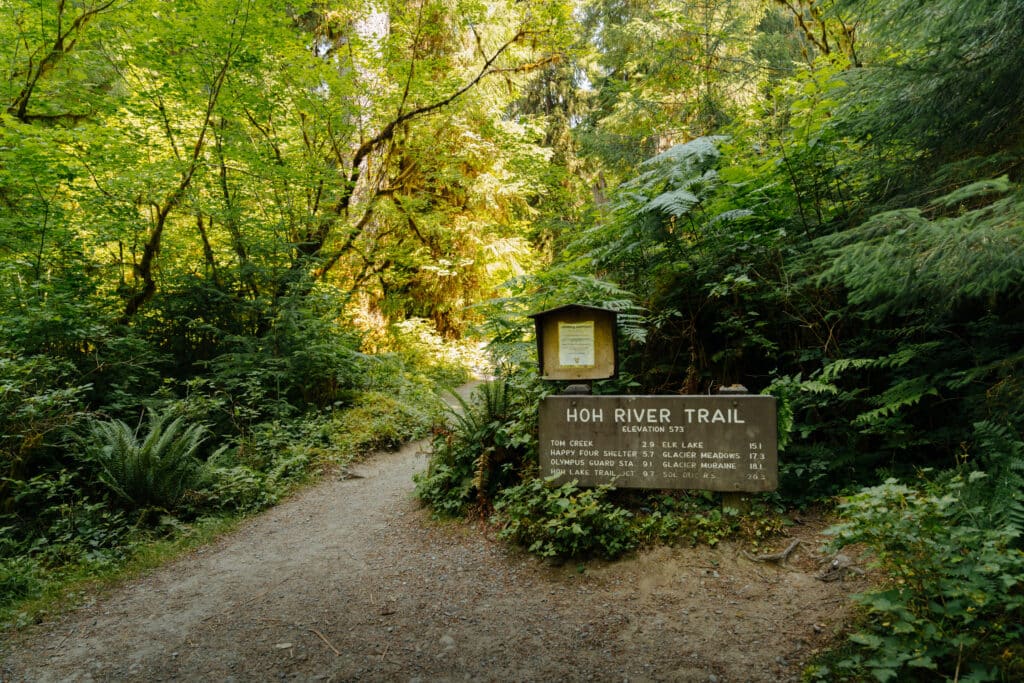
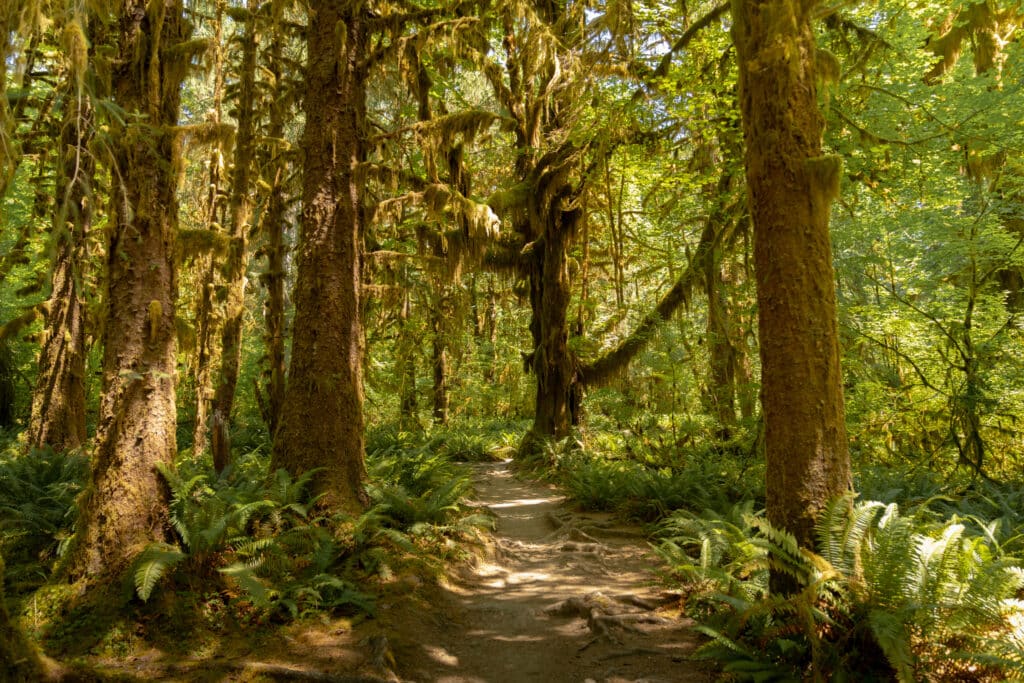
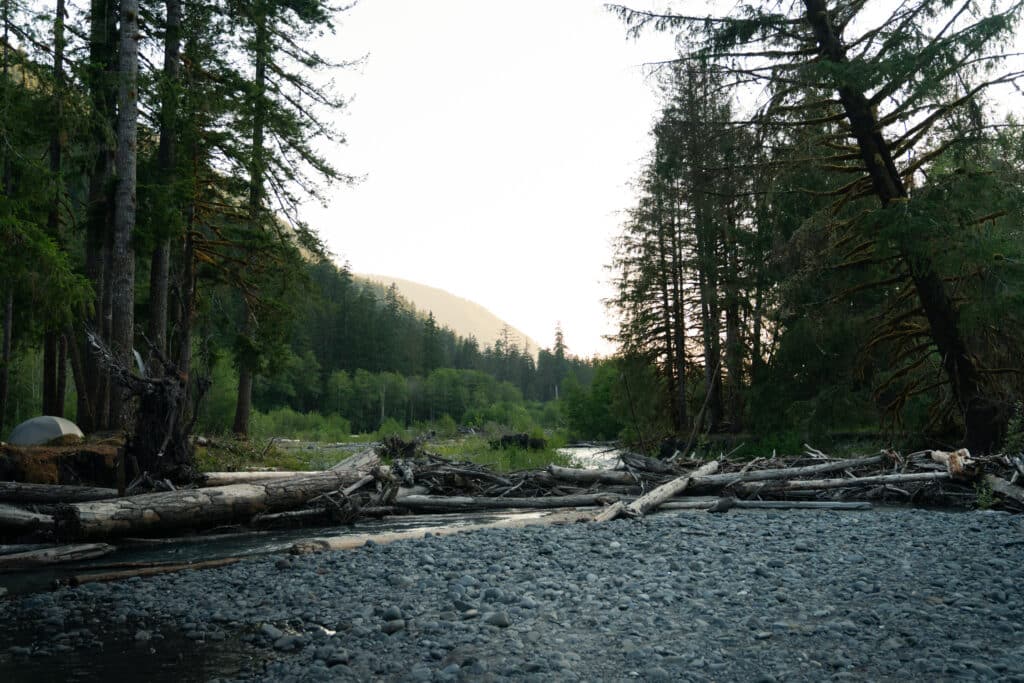
After waiting for an hour to get into the park (don’t make the same mistake I did – get there early!), I started the hike at the Hoh River trailhead. This section of the trail is pretty flat, so it’s not too hard – but, the heat made it a little more difficult. For the most part, the trail is really easy to follow. You’ll walk through the temperate rainforest, enjoy plenty of shade from all the trees, and have occasional river views and plenty of streams if you need to filter water.
Five miles in, you’ll reach the Five Mile Island campsites – this means that you’re (almost) halfway to Lewis! This is a great spot to have a snack and take a break by the river. Up until now, the trail had been pretty busy, but it gets much quieter after Five Mile Island.

At around 8 miles, you’ll need to wade through a river – the trail gets a little bit confusing here, and my GPS acted a little weird. But, there are pink ribbons on the trees that let you know where to go! You’ll walk across the river – it was a little under knee deep for me, but if it’s rained a lot recently the crossing can be more difficult. When you get to the other side, the ribbons point you to the right. Walk that way, and soon you’ll get to a second river crossing. Yes, you’re going the right way! Cross that same river again. This section was shallower and slower than the first one when I hiked this trail.
At about 9 miles you’ll pass the Olympus Ranger Station, and at 10.5 you’ll be at Lewis! You can find a spot to camp in the meadow, which has the advantage of being closer to the bear wire and the privy, or find somewhere to pitch your tent near the river, which is what I recommend doing. Make sure that you always set up camp on bare ground – avoid killing the plants!
Day 2: Lewis Campground to Glacier Meadows
Distance: 6.1 miles (9.8 km)
Hike Time: I consider myself an average hiker, and this portion took me 6 hours and 10 minutes. Check it out on Strava!
On the second day, I packed up my camp and headed to Glacier Meadows. Here, the trail gets harder. From Lewis Campground, the trail remains flat for about three more miles, then starts gaining elevation. You’ll go uphill through the forest.
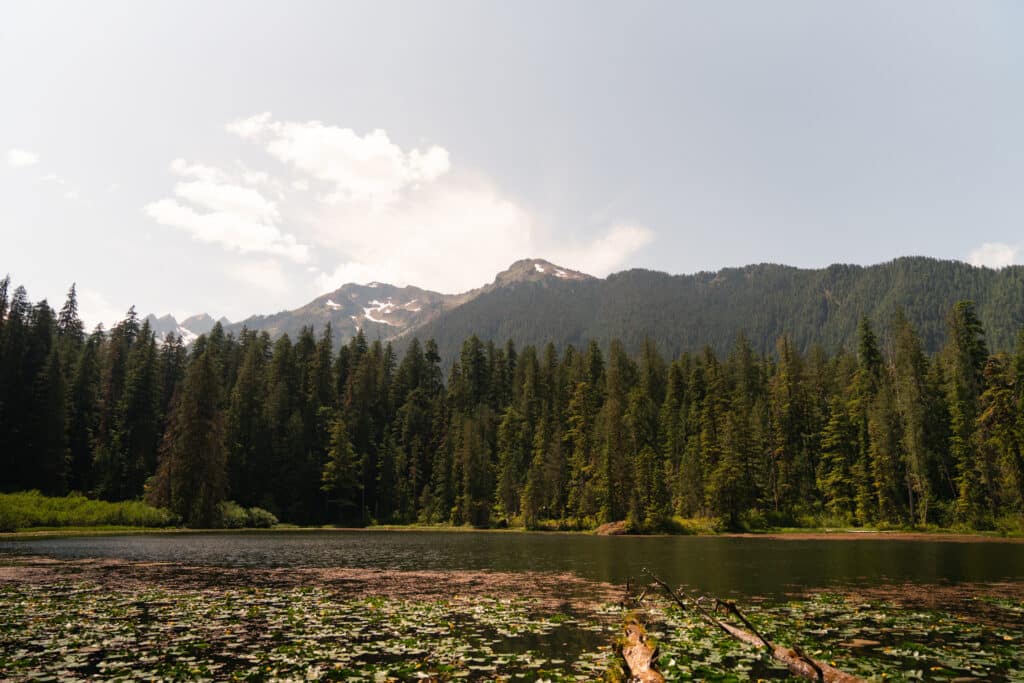
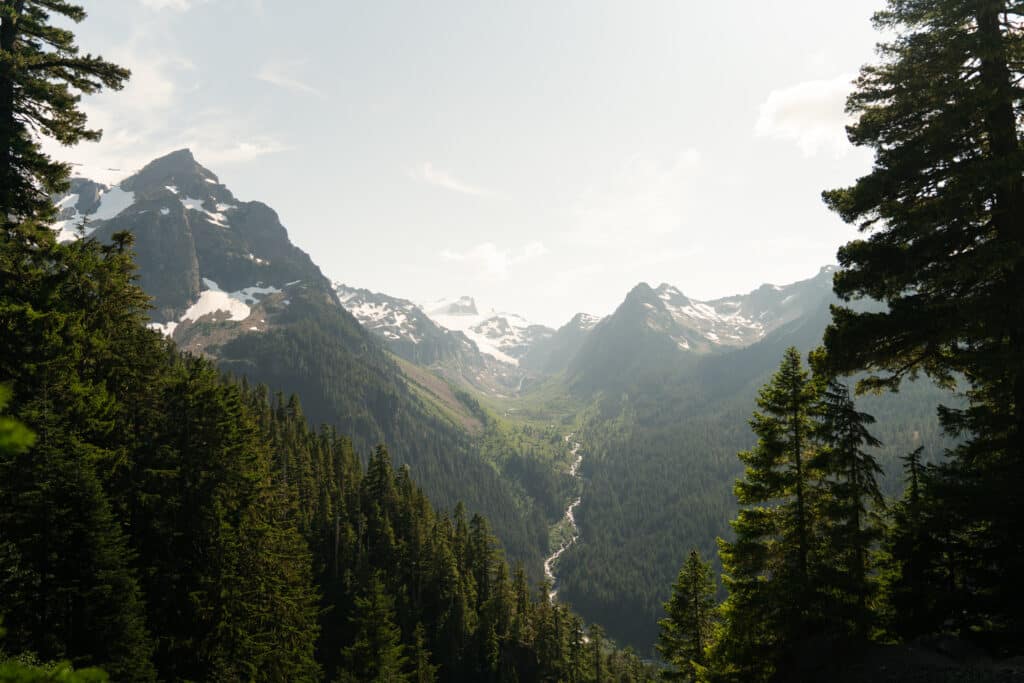
Shortly before Elk Lake, there’s a gorgeous river that makes for a great place to stop! Elk Lake is pretty too, and I recommend taking the quick trail down to see the lake. Continue on, and you’ll soon start seeing some gorgeous glacier views through the trees.
There’s a short, but kind of scary part where you have to walk across some scree (loose rock on a slope) to get to the trail on the other side. The rocks slip a little under your feet, so it’s a little nerve wracking, but it’s over quickly. You’ll start getting some glacier views!
Shortly after that, just a quarter mile from Glacier Meadows, you’ll get to a ladder that goes down the sandy cliff side. It’s tough, but you’ll definitely be grateful it was there. Go down the ladder (and be glad that coming up is actually a little easier), then go up the talus field to hop back on the trail. Soon, you’ll be at Glacier Meadows!

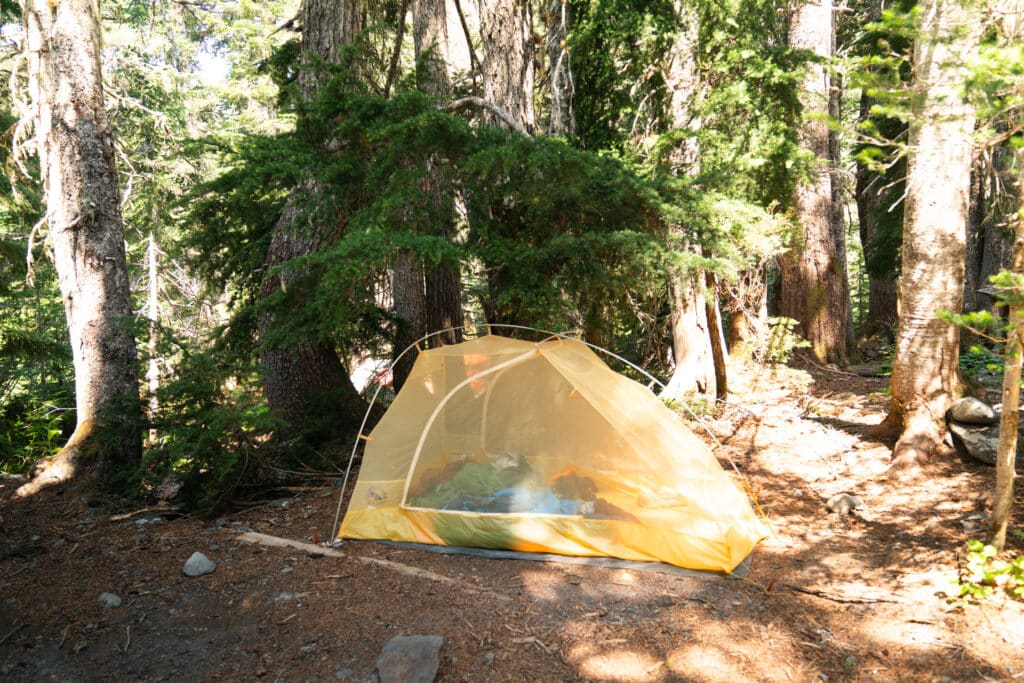
The mosquitos were really brutal from Glacier Meadows and up to Blue Glacier – a head net would be a good idea. I set up camp and ended my day there.
Day 3: Glacier Meadows to Blue Glacier to Lewis
Distance: 2 miles (3.2 km) out and back to Blue Glacier, then 6.1 miles (9.8 km) back to Lewis
Hike Time: I consider myself an average hiker, and this portion took me 5 hours and 31 minutes. Check it out on Strava!
On day 3, I left all of my stuff at camp, and went to Blue Glacier with just my fanny pack (which I attached my water bottle to) and my camera. It was really nice to not have my heavy pack on, but the mile up to Blue Glacier was surprisingly tough – it’s a steep climb up, and there’s no shade. Plus, there are those pesky mosquitos. I wished that I’d woken up earlier to beat the sun and have better lighting, but it was still fun! There was one patch of snow, but it was totally fine, even in my Chacos.
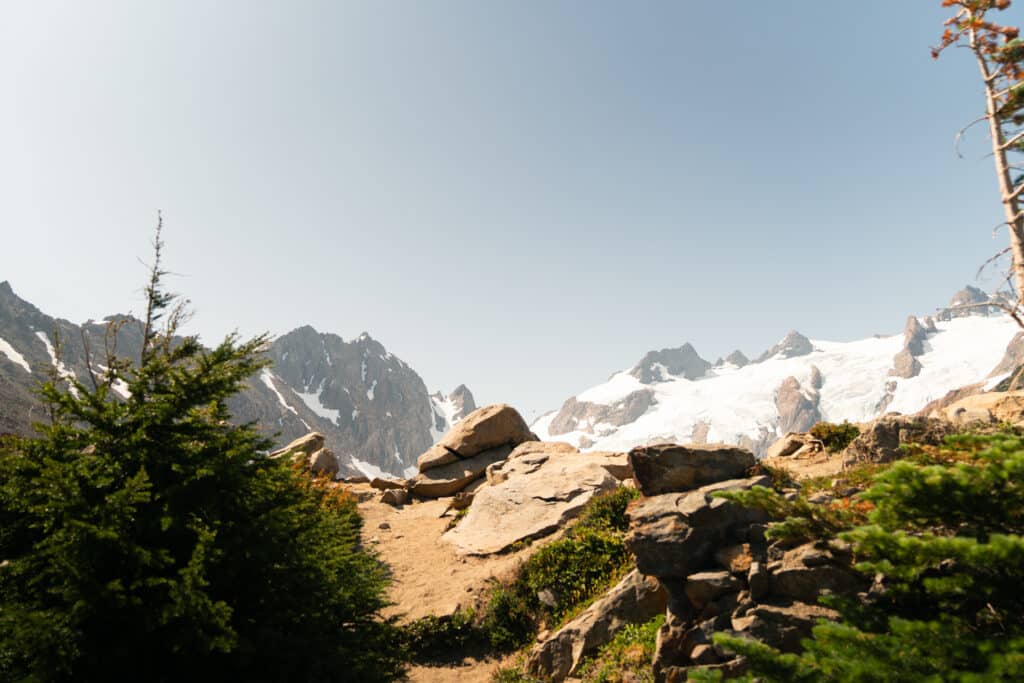
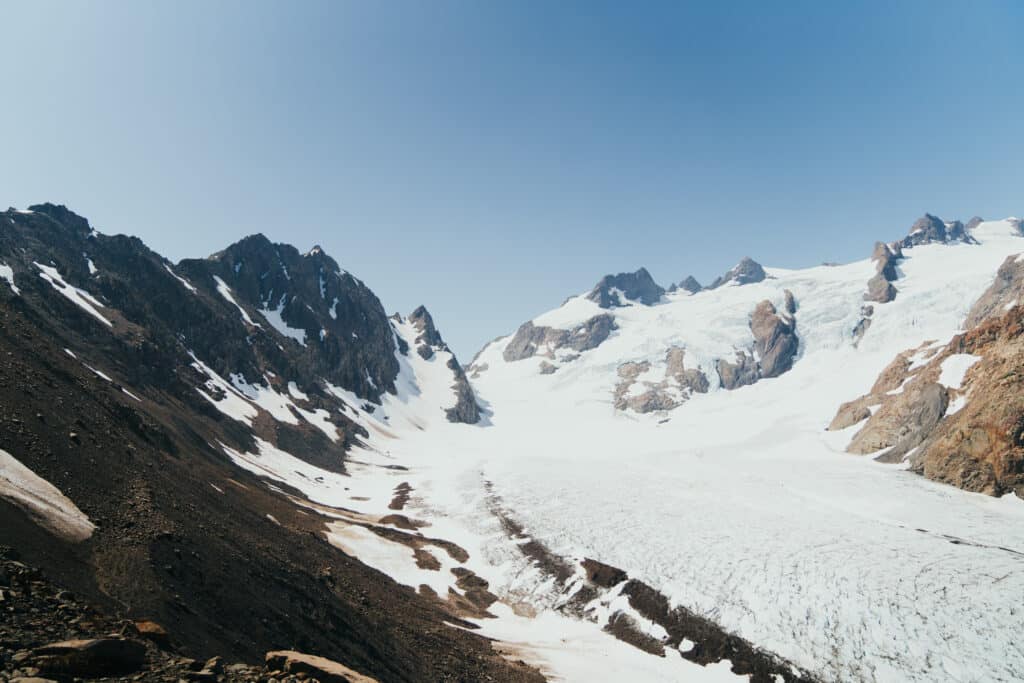
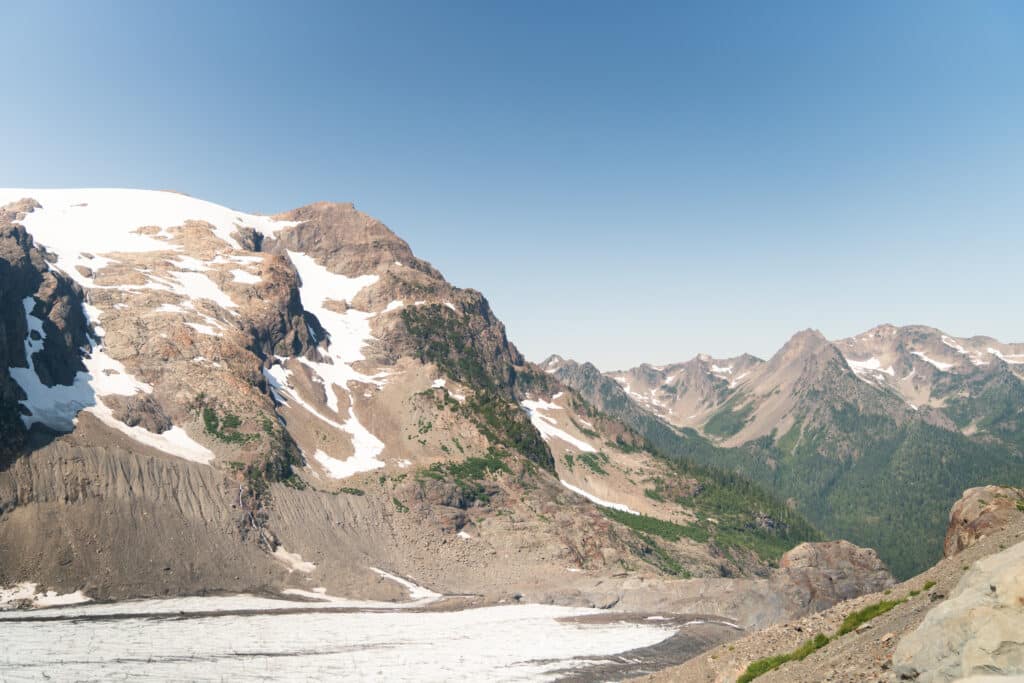
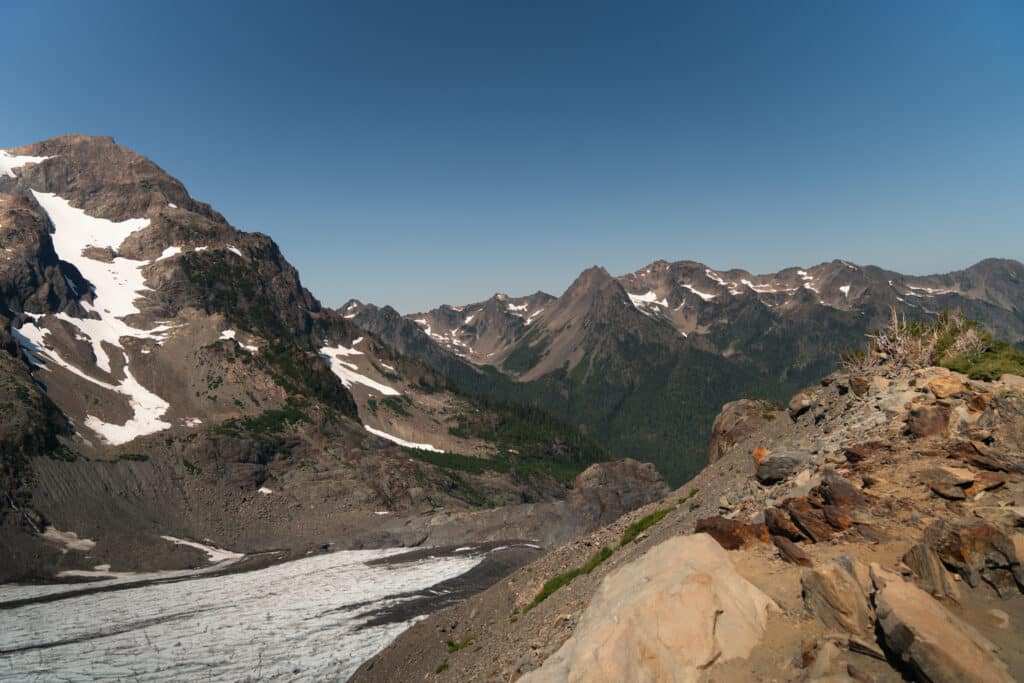
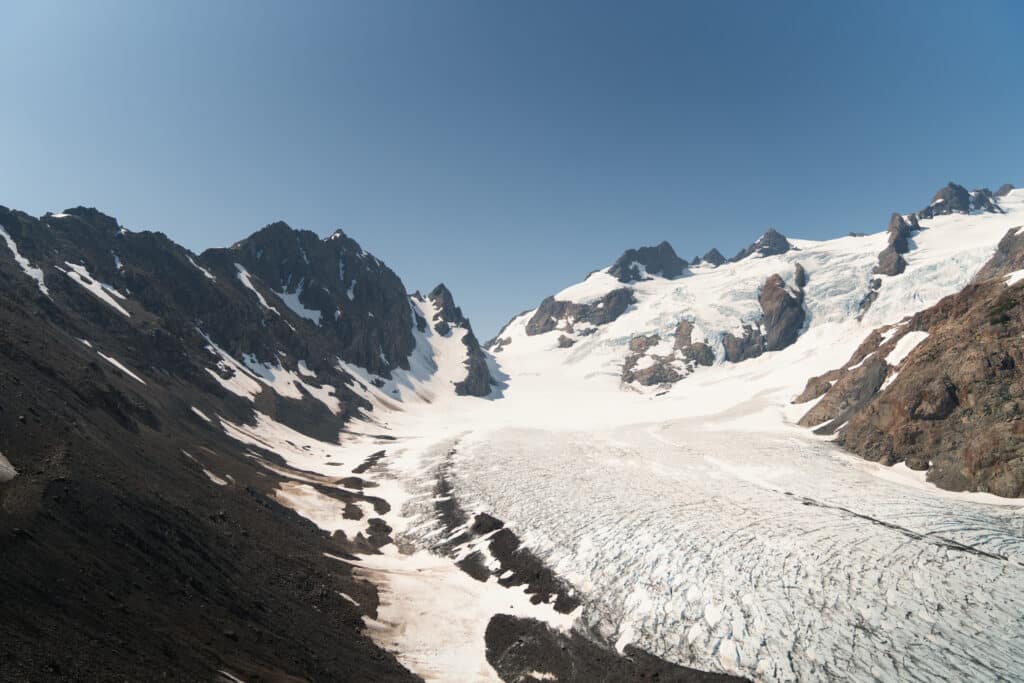
The rest of the hike up isn’t long, and soon enough, you’ll find yourself coming up over a ridge to views of Blue Glacier. And it’ll be completely worth it. The glacier is absolutely gorgeous. You can keep walking on the ridge to the left – the views don’t change much, but the official end of the trail is marked by a stick in the ground.
Once you’re done enjoying the view, it’s time to head back down! I went back to Glacier Meadows, packed up my stuff, and headed back to Lewis. It’s downhill, so other than going up that ladder, it’s not too hard. I camped in the same spot by the river as I had the first night
Day 4: Lewis Meadow to Trailhead
Distance: 10.5 miles (17.9 km)
Hike Time: I consider myself an average hiker, and this portion took me about 5 hours and 30 minutes. My watch died after 2 miles, so I wasn’t able to keep track – but, the route is the same as the first day, just backwards.
Day four was 10.5 miles of mostly flat forest walking. It was kind of tough on sore legs, and a long walk, but soon enough, you’ll be back at your car!

More Adventures Nearby
Have you hiked this trail, or are you adding it to your bucket list? Let me know in a comment below!
For more adventures nearby, I really recommend backpacking the South Coast Wilderness trail. For an easier overnight, the Lake Angeles trail is a great easy place to backpack to. If you’re feeling a day hike, Mount Storm King is one of the most beautiful places in the park, or you can walk the easy Staircase Rapids Loop.
Pin any of these photos to save this guide to Backpacking the Hoh River Trail to Blue Glacier for later!