How to Backpack the Olympic South Coast Wilderness Trail
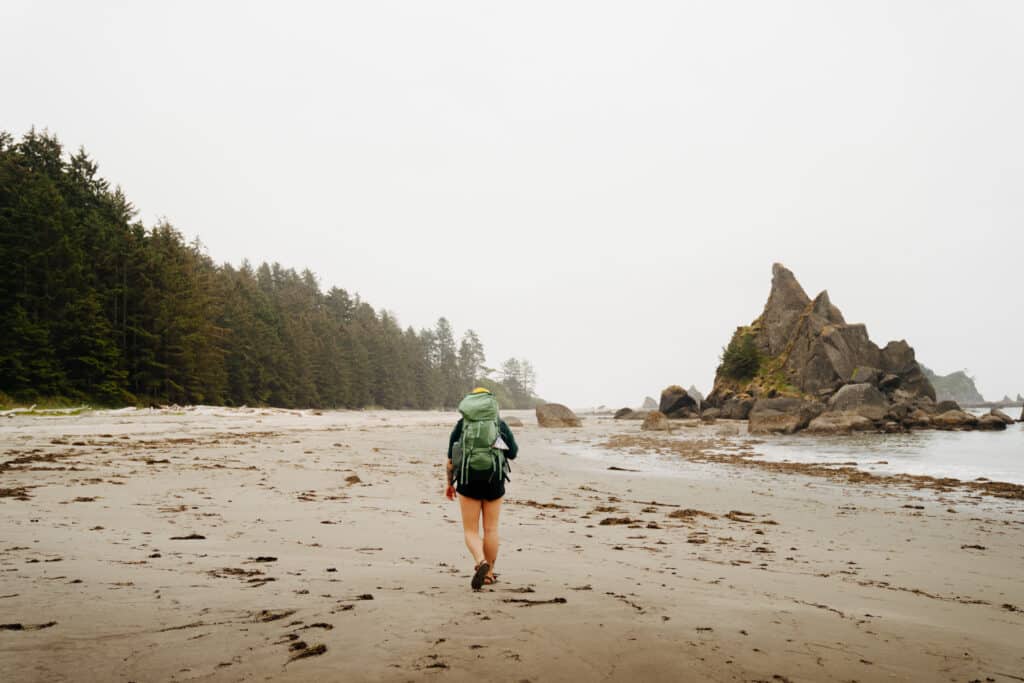
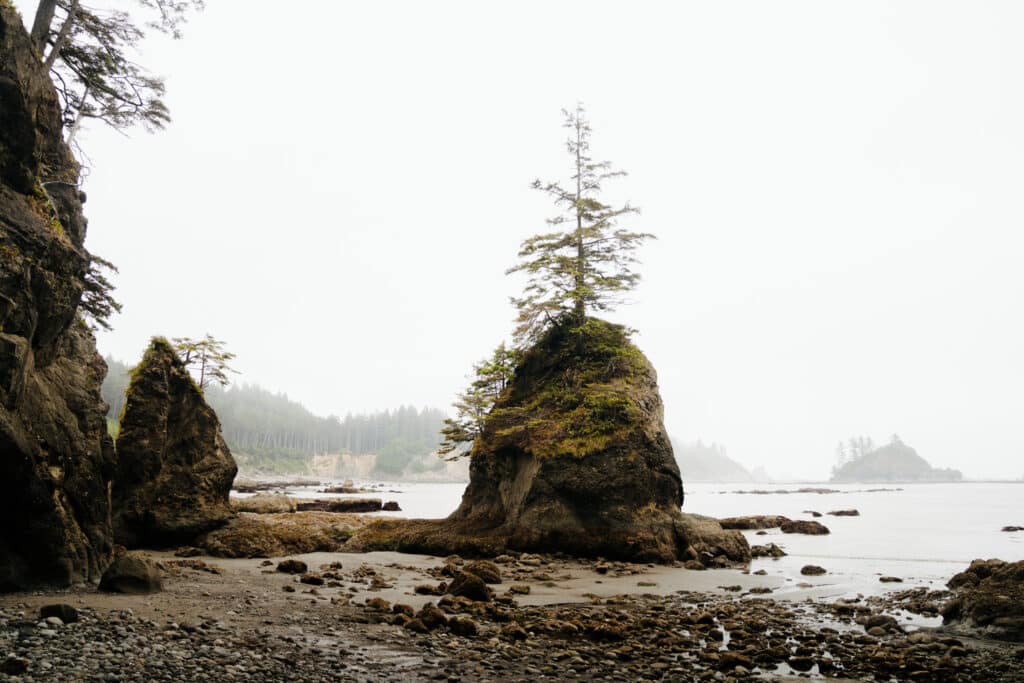
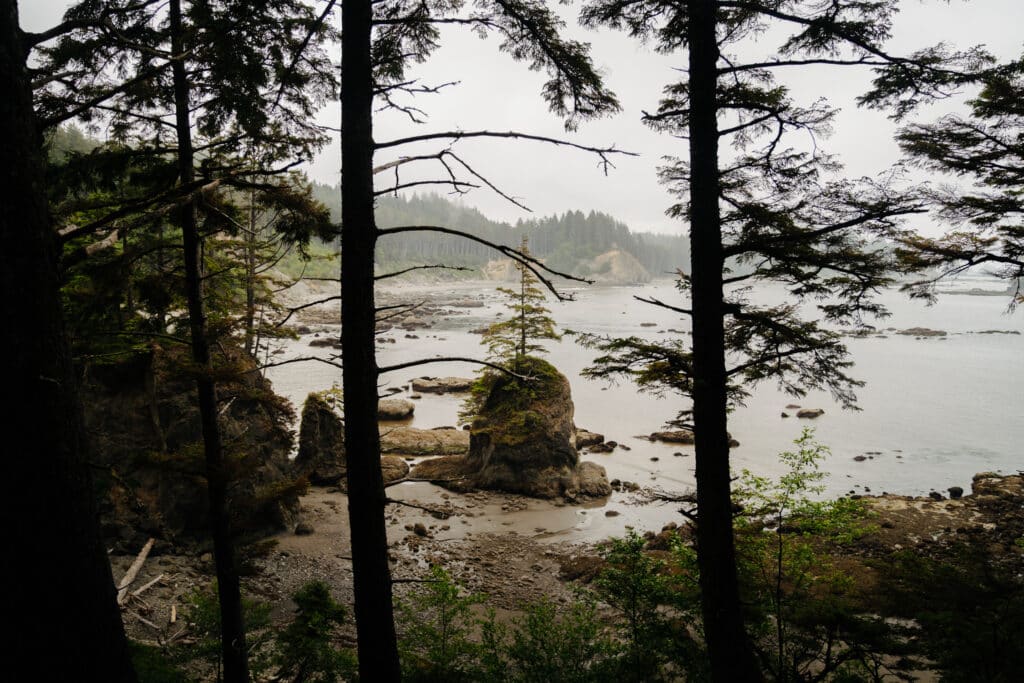
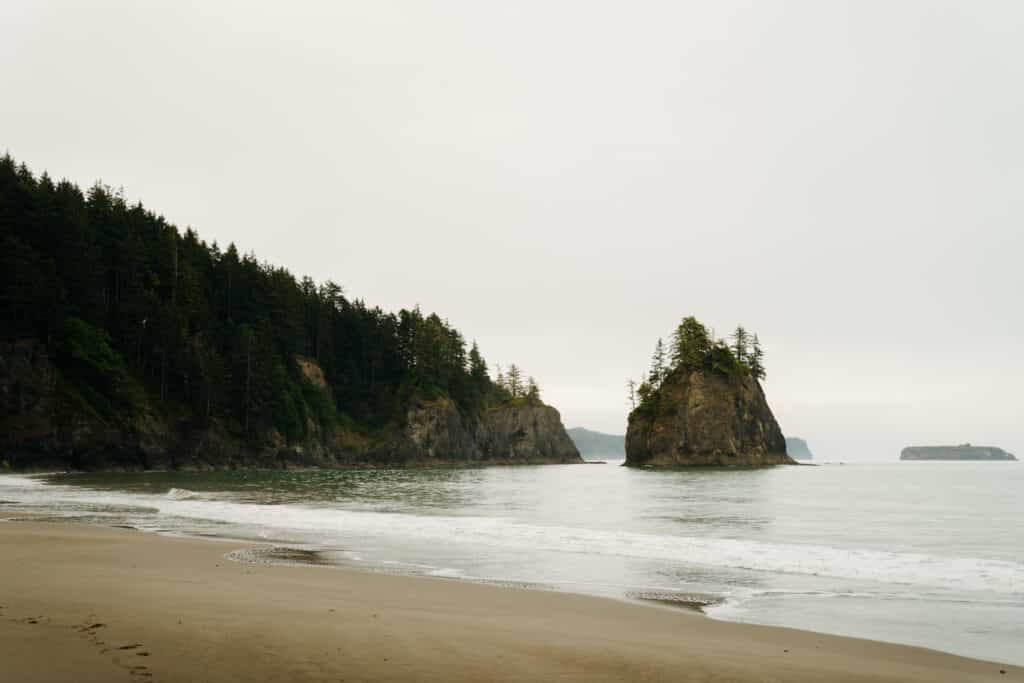
The South Coast Wilderness trail in Olympic National Park, Washington is an incredible adventure – taking you along the rugged, remote coastline and up into lush green forest. You’ll see breathtaking sea stacks, wake up to the sound of crashing waves, climb nearly vertical ladders up into the headlands, and enjoy walking on the wild beaches. The trail is perfect for beginner backpackers and experienced adventurers – it’s challenging in places, but absolutely beautiful and not terribly strenuous. This guide will tell you how to backpack the Olympic South Coast Wilderness trail – how to read tide charts, how to plan your adventure, where to camp, and more!
Head’s up: some of these links are affiliate links, so I get a commission if you make a purchase (at no cost to you). But that’s great, because I was going to share anyway, and this helps me keep making free guides for you!
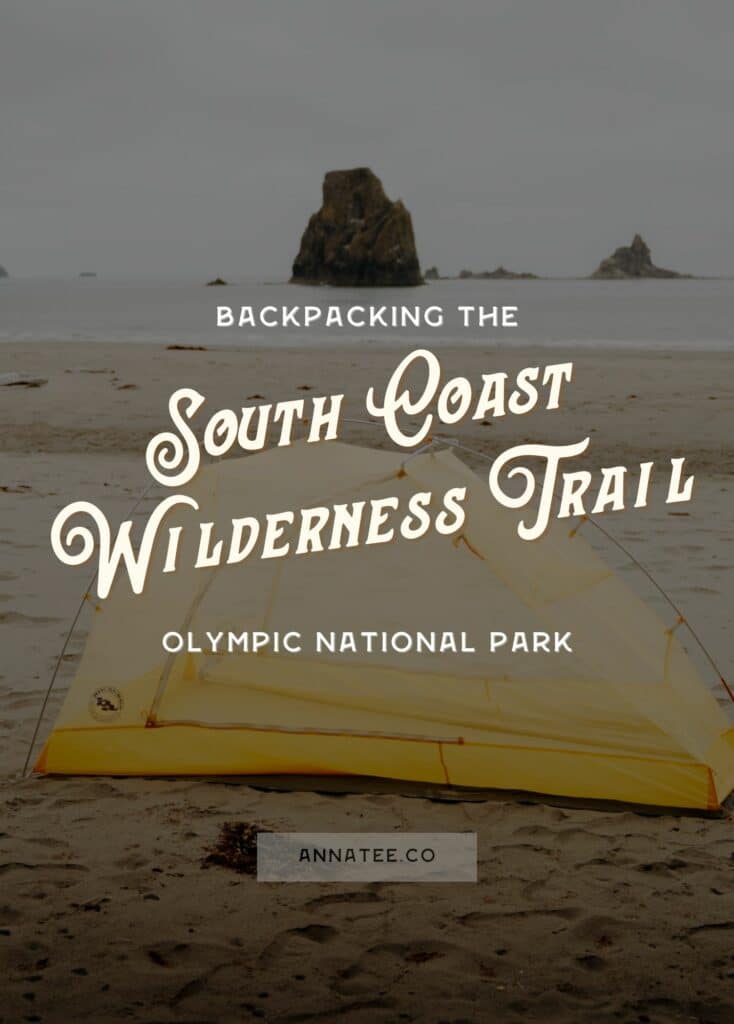
Pin this photo to save this Guide to Backpacking the South Coast Wilderness Trail and reference it later!
Table of Contents
About the South Coast Wilderness Trail
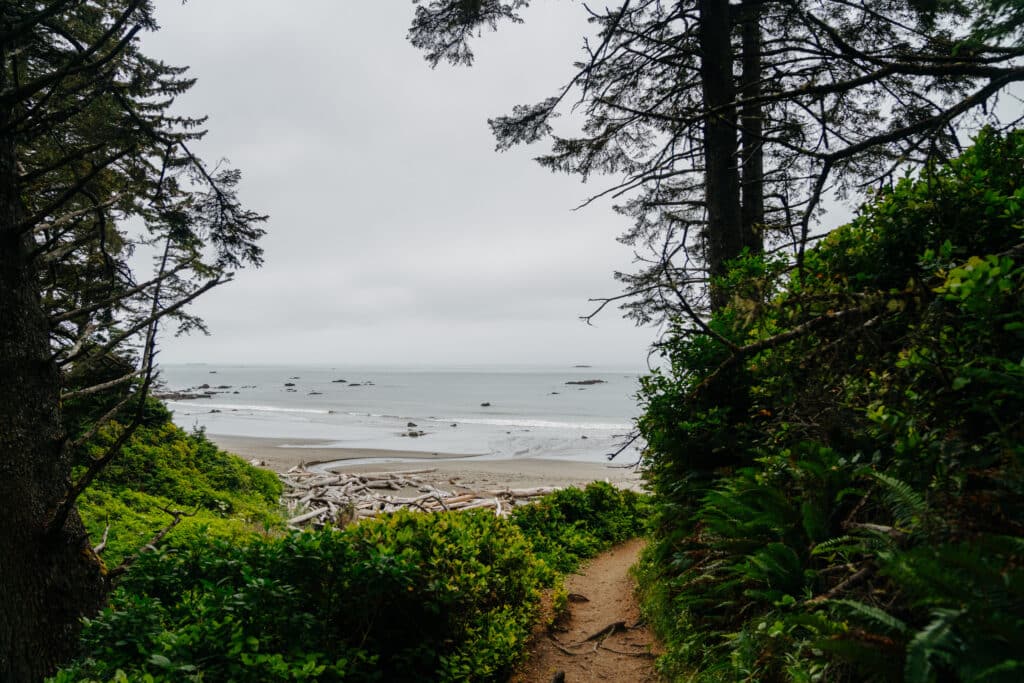
Some of the South Coast Wilderness trail takes you along the beach, but these sections of flat walking are interrupted by the overland trail that takes you up steep cliff sides when you can’t walk by the water. One of the most challenging, but important, parts of backpacking this trail is learning how to read tide charts – there are sections that are impassible at high tide! Make sure you’re prepared, and keep reading.
South Coast Wilderness Trail Stats
Length: 17 mile (27.36 km) thru-hike
Elevation Gain: 1900 feet (579 m)
Difficulty: Moderate
Number of Days: I did this hike in 2 days, but I recommend three
Hike Time: I consider myself to be an average hiker (but a beginner backpacker) and this trail took me 11 hours and 13 minutes of hiking time. You can see my hike on Strava: Part 1, 2, & 3
Leave No Trace
Anytime you’re outdoors, it’s essential that you practice Leave No Trace (LNT). LNT is a set of seven principles that help us understand our impact on the outdoors – because while we usually have good intentions, the environment is more fragile than we think, and one snap-second decision can cause damage to the environment that will take the earth years, even decades to repair.
Leave No Trace means enjoying the outdoors without disrupting nature, as much as it’s possible to do so. Here are the 7 principles of LNT, and how they apply when you hike the South Coast Wilderness trail!
- Plan ahead and prepare – read this guide, make sure you know have the right gear, and be prepared for any weather. Know how to read tide charts!!
- Travel and camp on durable surfaces – stay on the trail to avoid trampling grasses and plants!
- Dispose of waste properly – don’t leave trash, or anything else, behind. Pack it out! There are bathrooms at two of the campsites, but bring a trowel just in case, and pack out your toilet paper if you need to use it on trail.
- Leave what you find – I know it can be tempting to take a cool rock or shell, but leave these things where they belong! Animals often use these, and if everyone takes one, the trail won’t be as pretty.
- Minimize campfire impacts – fires are allowed on the beach, but you can only use driftwood.
- Respect wildlife – don’t approach wild animals, and never feed them. It’s bad for their stomachs, causes aggression, and messes with their natural patterns. This trail also requires that you bring a bear canister! There are no bears on the coast, but there are raccoons that can aggressively try to eat your food.
- Be considerate of other visitors – yield to other hikers, and be respectful – no speakers or loud music.
The Best Time to Backpack the South Coast Wilderness Trail
The South Coast Wilderness trail is located in Olympic National Park, so your biggest concern when it comes to the best time to backpack will be rain. The best time to hike is usually May through September – but the ends of this time frame, though less crowded, are also less predictable. Your best bet for a rain free, dry hike is June through August!
But, regardless of when you hike, you should be prepared for rain. Have a rain fly on your tent (I didn’t put mine on the first night because I wanted to be able to see the ocean, but I was woken up by a drizzle!), and bring a rain jacket.
Don’t Forget Your Pass!
Because the South Coast Wilderness trail is located in Olympic National Park, you will need a pass to park your car. It costs $30 per car, but if you visit national parks often (or at least more than twice a year), I recommend getting an America the Beautiful Pass! It’s an annual pass that will get you into every national park in the country for an entire year, for just $80.
You have to go a little out of the way to buy a pass in the park, so I recommend getting your America the Beautiful pass online ahead of time!
Which Way Should You Hike the South Coast Wilderness Trail?
The South Coast Wilderness trail is a thru hike, which means that it goes from one trailhead to a different one, as opposed to a trail that starts and ends in the same place. While you could turn this into a 34 mile out and back hike, it’s definitely more fun to… not do that.
So, you’ll need to decide which trailhead to start at, and which one to end at. And don’t worry – if you’re hiking solo and only have one car, there’s a shuttle that can take you from one trailhead to the other!
The two trailheads for the South Coast Wilderness Trail are at Third Beach and Oil City. Third Beach is a popular spot for hikers and campers, with a busy parking lot. Oil City is more remote, and is safer in terms of break ins.
If you only have one car, I recommend parking at the trailhead you want to end at. That way, you don’t have to coordinate with the shuttle after you’ve hiked all those miles. If you have two cars, park one at Third Beach and one at Oil City!
Since I needed to take the shuttle, I parked at Oil City – I made this decision simply because it’s a safer place to park. I then took the shuttle to Third Beach, and hiked the South Coast Wilderness trail from north to south. The difficulty of the trail is pretty much the same regardless of which way you go, so there isn’t really a better or worse option for which way you hike. But, the north end tends to be a lot more popular, so it can be nice to start at Third Beach with the crowds, and then get more and more remote as you hike south.
Before you get your permit, decide which way you want to hike! Then, you’ll need to choose your campsites.
The South Coast Wilderness Trail Shuttle
If you have two cars, you can park one at one trailhead, hop in the other car and park that at the other trailhead, then pick up the first car and drive back to the other trailhead when you’re done hiking.
But, if you only have one car, or don’t want to do all that driving, there’s a convenient shuttle available from Oil City to Third Beach, and vice versa! Olympic Hiking Co. offers a shuttle that will take you between the trailheads. It currently costs $75 per person, but the cost goes down to $50 each if you have a group of three or more.
One important thing to note: the shuttle requires a minimum of two passengers to run! This means that if you’re a solo hiker, if no other groups have booked the shuttle for that day, you will have to pay for two tickets. When you go on the website to book a ride, you can see if it requires you to book two spots or not for the day you select. Because of this, as a solo hiker, it can be helpful to go during the weekend, as there will likely be another booking. I originally was going to start my hike on a Monday, but I switched to a Friday to avoid paying for two seats!
Campsites on the South Coast Wilderness Trail
When you book a permit for the South Coast Wilderness Trail, you’ll need to select the campsites you want to stay at.
There are four main camping areas (from north to south): Third Beach, Scott Creek, Toleak Point, and Mosquito Creek.
Third Beach and Scott Creek are pretty close to the Third Beach trailhead, so for a two night trip, I recommend camping at Toleak Point and Mosquito Creek. Both have fresh water close by, and this spaces out your miles of hiking pretty well!
From the Third Beach trailhead it’s 6.4 miles to Toleak Point, then 4.6 miles from Toleak Point to Mosquito Creek, and 6.1 miles from Mosquito Creek to the Oil City trailhead.
How to Get a Backpacking Permit
Along with the national park pass (which you’ll leave in your car at the trailhead), you also need a permit to backpack the South Coast Wilderness trail. It’s a must if you’re staying overnight!
The permit is pretty easy to get – though it gets busy, so you will most likely be able to get a permit even if you’re planning this trip kind of last minute. Go to Recreation.gov, and you’ll see a page for Olympic National Park wilderness permits. Head over to the “check availability” button, and you’ll need to select a starting area.
Select “South Coast,” choose the number of group members, and put in the date you want to go. You’ll need to select your campsites – Toleak Point and Mosquito Creek are the best options, in my opinion. If you’re going southbound (Third Beach to Oil City), Toleak Point will be first. If you’re going northbound, Mosquito Creek will be first.
Select your dates, click “Book Now,” and then you’ll be asked for more information.
Note: You will be asked to choose where you’ll pick up your permit, but it’s no longer required to pick it up in person. The park now allows you to print the permit yourself. However, bear canisters are required to backpack the South Coast trail, and if you don’t have one you can borrow one from one of the stations.
The permit costs $8 per person per night, plus a $6 flat reservation fee, so it’s $22 for one person for two nights.

How to Read Tide Charts
One really important thing to know about the South Coast Wilderness trail is that you will have to read tide charts. There are three sections of the trail that have tide restrictions – which means that the tide has to be low enough, or you won’t be able to pass safely. Make sure you have a map of the trail while you’re hiking – there are no signs along the trail to let you know where you are!
Tidal Restrictions on the South Coast Wilderness Trail
Here are the three tidal restrictions along the South Coast Wilderness trail:
- 3 miles south of the Third Beach Trailhead – tide needs to be 4.5′ or lower
- 4.25 miles south of the Third Beach Trailhead, between Scott Creek & Strawberry Point – 4′ or lower
- 1.5 miles north of Oil City Trailhead, at Diamond Rock, south of Jefferson Cove – 2′ or lower
There are also a few creeks between Toleak Point and Mosquito Creek that are easier to cross at low tide – I’ll talk about these in more detail later! The Diamond Rock tidal restriction is the tightest – and this section is sometimes impassible for days at a time. Before you book your permit and commit to dates, I recommend checking the tide charts to make sure it’s physically possible for you to do the hike on that day.
How to Read Tide Charts
This is the part I was most worried about when I backpacked the South Coast Wilderness trail – reading tide charts, and timing my hike. But, don’t worry – it’s not hard!
You can see the tide predictions for La Push here – scroll down, and under the chart you can change the dates. I recommend plotting one day at a time, since this makes the chart easier to read. Click “Plot Daily” to update the chart.
I started my hike on June 23, 2023 – on this day, I was planning to start at Third Beach and end at Toleak Point. This meant I would have to cross two tidal restrictions – one where the tide needs to be 4.5′, and one where it needs to be 4′. If you go to Threshold Direction and change that to <= (less than or equal to), and put 4 for the Threshold Value, the chart will show the portion of the day where you can cross in red. This makes it a little easier to see!
So, this was my chart for the first day of the hike.
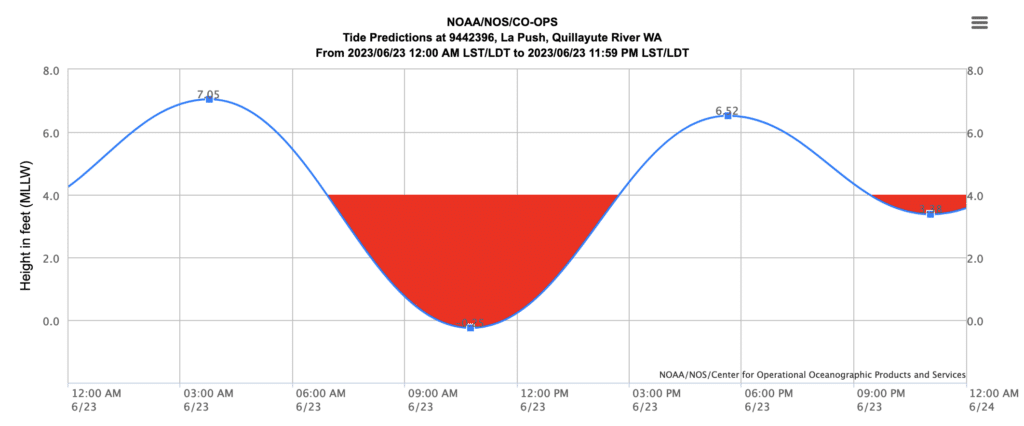
According to this chart, both of those tidal restriction sections will be passable from about 7 am to 2:30 pm. From there, you need to calculate how fast you hike, and plan what time you’ll reach the tidal restriction. When I did these calculations, I estimated my pace at 1 mile per hour – I hike a lot faster than that, but I would rather give myself too much time and wait for the tide to go down than arrive too late and be stuck or get swept away into the ocean. Plus, I take a lot of pictures and need some extra time in case I want to stop and pull out the tripod.
So, I was really conservative with my estimates and crossed every section just fine! Make a plan for each day, decide ahead of time when you need to leave camp to safely cross those tidal restrictions, and give yourself more time than you need.
What to Bring to Backpack the South Coast Wilderness Trail
When you backpack the South Coast Wilderness trail, here’s what you’ll need to bring!
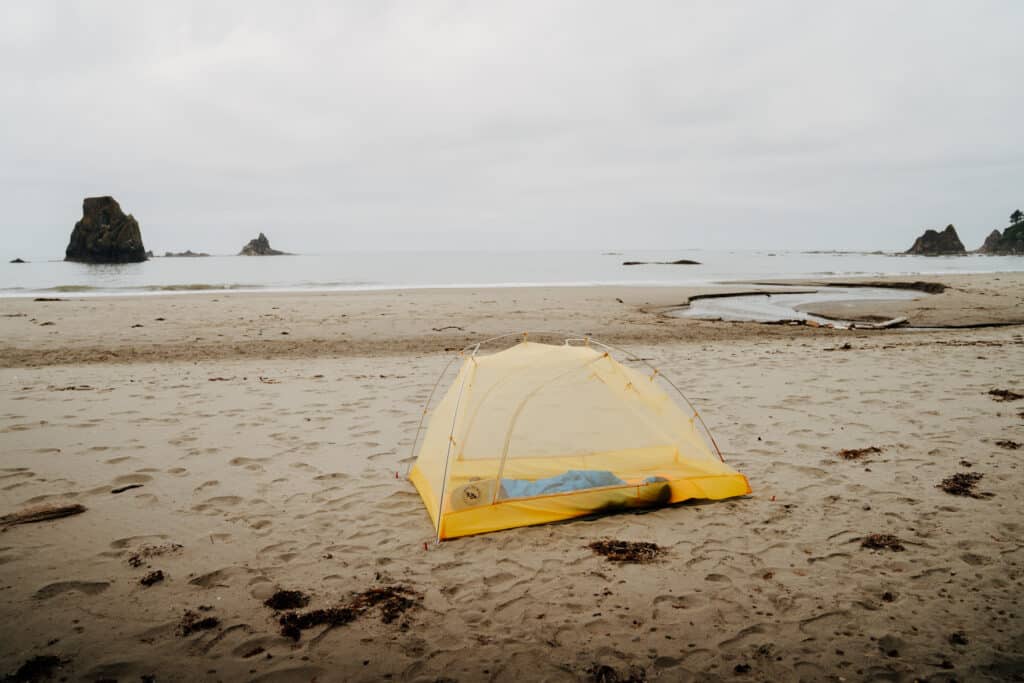
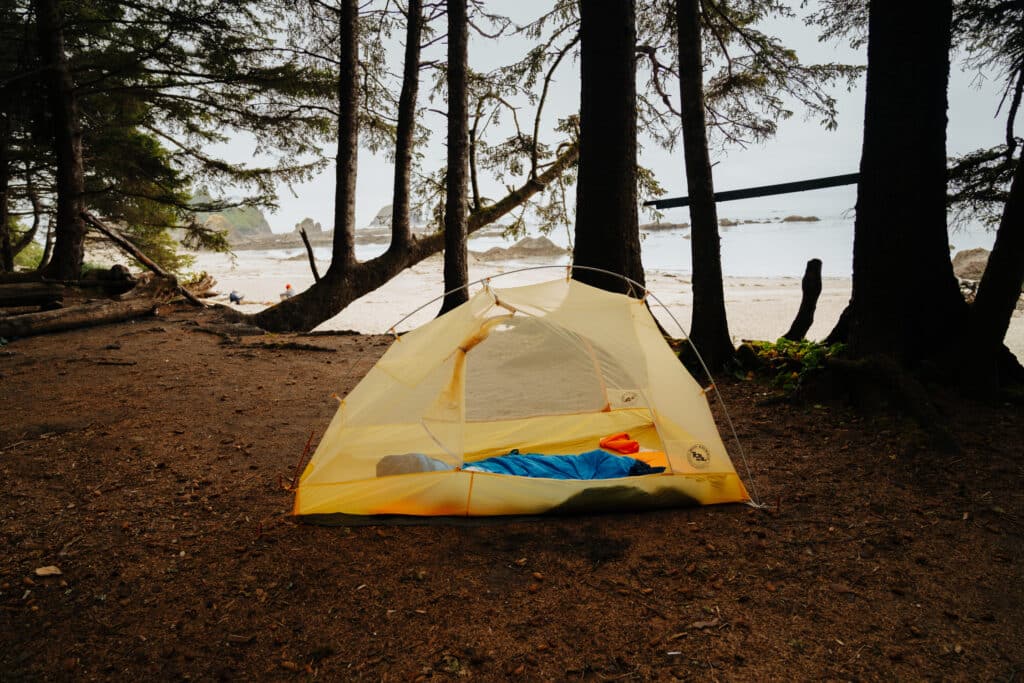
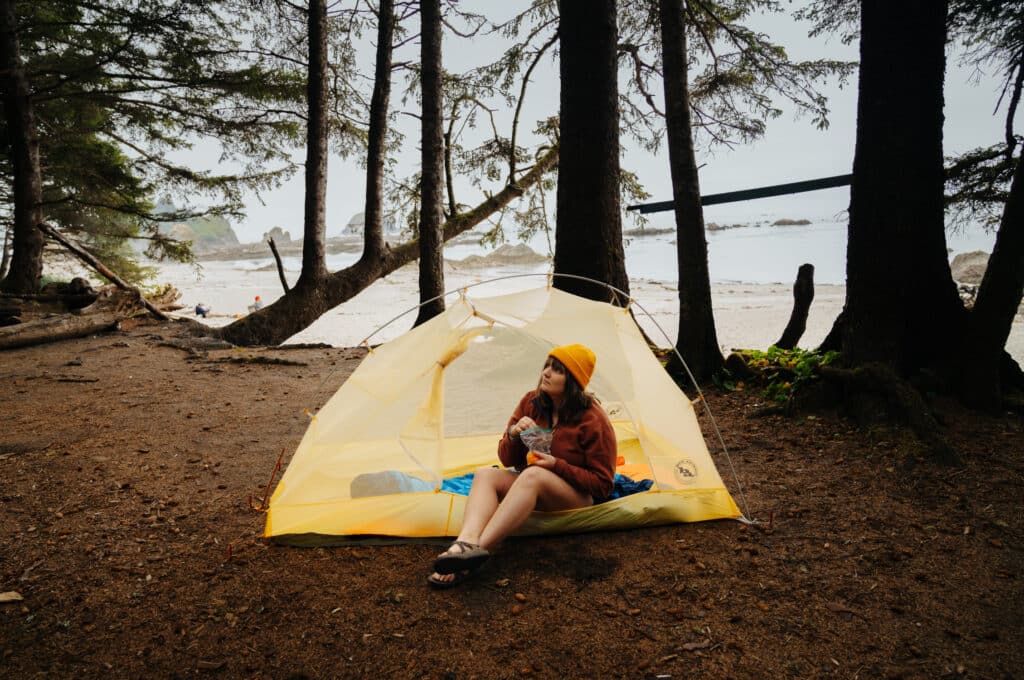
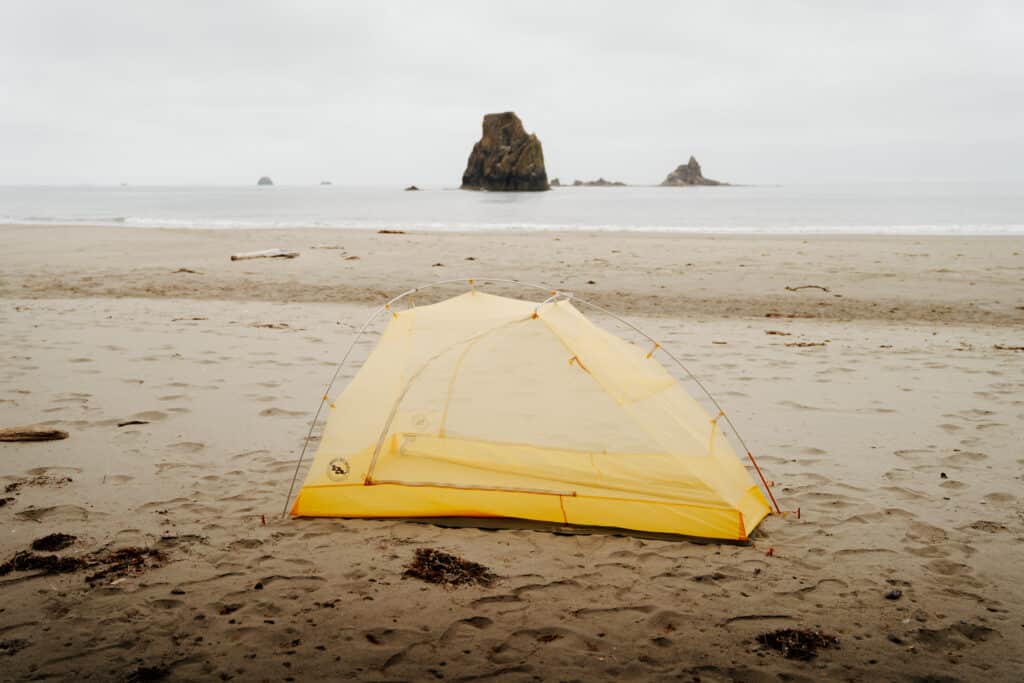
- Tent – somewhere to sleep! I love my super light Big Agnes Tiger Wall tent, and I also use a footprint to keep the bottom safe & dry.
- Sleeping Bag – make sure you have something warm enough! I use this ALPS Mountaineering sleeping bag.
- Sleeping Pad – an essential for a comfy night of sleep! I have this Sea to Summit pad, but am planning to upgrade to a thicker one, like this Therm-a-Rest pad soon!
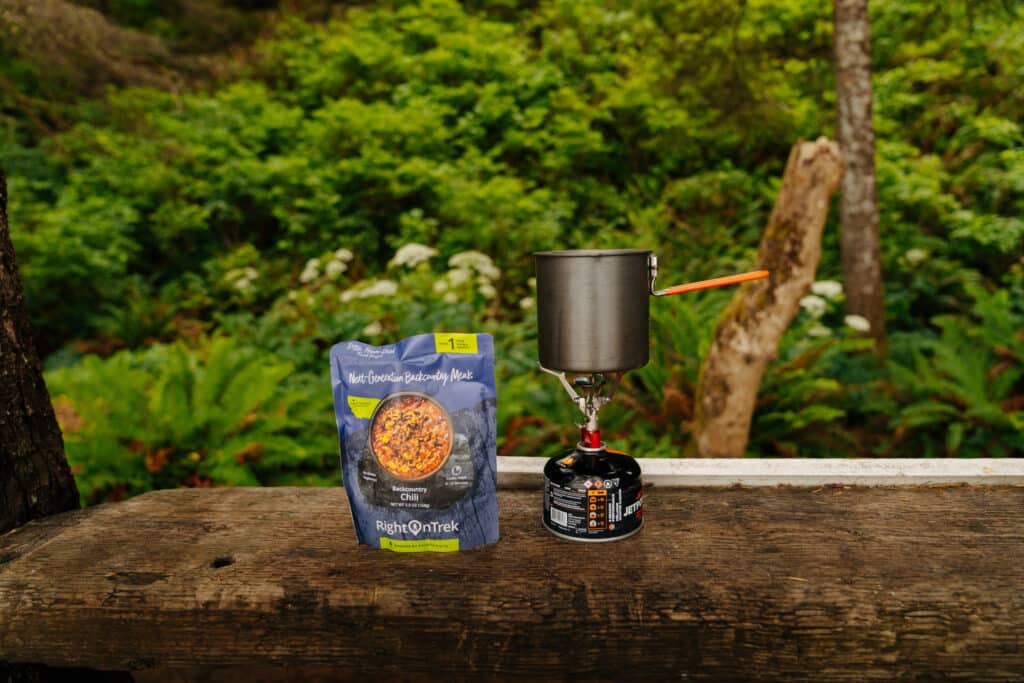
- Camp Stove – there’s nothing like having a hot meal at camp. I use an MSR Pocket Rocket stove, which is incredibly small, along with this GSI Cookset.
- Bear Canister – for this trail, food and any scented items are required to be kept in a bear canister. If you don’t have one, you can borrow one from the ranger station.
- Hiking Shoes – parts of this trail are really steep, and often muddy from frequent rain, so make sure you’ve got something with grip. I prefer hiking in sandals and wore my Chacos for this one, but if you usually hike in boots, I like my Danner boots for when I want more ankle support.
- Layers – you should always bring a rain jacket on the Olympic Peninsula! I like my Marmot PreCip a lot for wind and rain, and I brought a fleece for warmth in the evening.
- Backpack – you’ll need a backpack to carry everything, and it needs to be big enough to fit a bear canister for this hike! I use a Deuter backpacking pack.
- Headlamp – a backpacking essential for after dark.
- Water – fresh water is easy to find on this trail, as there are lots of streams. Make sure you have a water bottle and a filter to get clean water. I love my Sawyer Squeeze!
Bonus Tip: A lot of these links are for my favorite place to buy outdoor gear – Backcountry. If you install the free Lolli extension on your browser, you can earn free Bitcoin when you shop online at certain retailers, including Backcountry. You can transfer it to a crypto wallet, or just cash out to your bank account.
Directions to the South Coast Wilderness Trailhead
There are two trailheads to choose from for the South Coast Wilderness trail – Third Beach, and Oil City.
If you’re flying in to Washington to explore the park, the closest airport is SeaTac, in Seattle.
Expedia is a good way to find flights and rental cars, I also super recommend signing up for Going (formerly Scott’s Cheap Flights) – they send you amazing deals, so you can find cheap flights to Seattle, and to destinations all over the world. The free account is great and totally worth the few minutes it takes to sign up, and I do recommend the premium account too!
If you fly into Washington, you can rent a car through Discover Cars or Rental Cars. But, a great alternative to a rental car is a tiny home on wheels! With a camper van, you get a vehicle and a place to sleep, all in one! This is my favorite way to travel, and you can rent a fully decked out van with Escape Campervans. Another option for vans is to use Outdoorsy, which is more like Airbnb for campers – you can rent a van, RV, or trailer from a person in the area.
From Seattle, you can either take the ferry (a fun experience if you aren’t from here!) to Bainbridge Island and keep driving from there, or drive south to Tacoma from Seattle.
To get to Third Beach, it’s a little faster to drive north through Port Angeles, and for Oil City, it’s faster to drive south through Montesano.
Third Beach Trailhead Coordinates: 47.890594,-124.5993023
Oil City Trailhead Coordinates: 47.7493298,-124.4086722
South Coast Wilderness Trail Itinerary & Breakdown
I went from north to south (starting at Third Beach and ending at Oil City), so this guide follows that route! But of course, you can flip it and go the other way.
I parked my car at Oil City, because that trailhead is more remote and experiences fewer car break ins. The shuttle from Olympic Hiking Co. picked me up, and we left at 9:30 to head to Oil City. The drive is about an hour, so when we got to Third Beach, I hopped out and started hiking!
Day One: Third Beach to Toleak Point (6.4 miles)
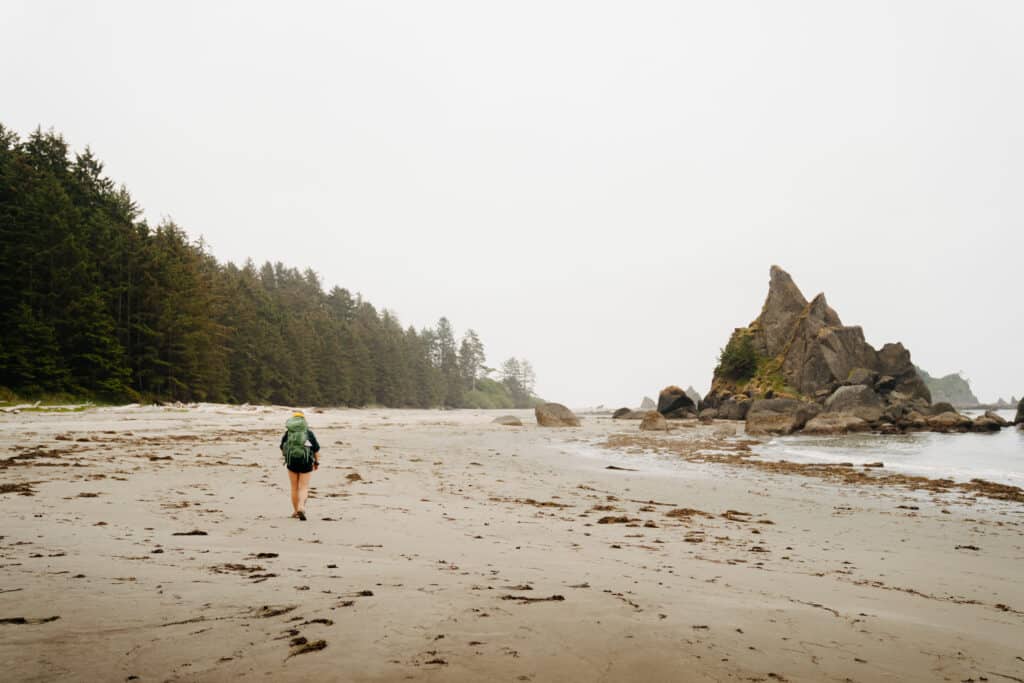
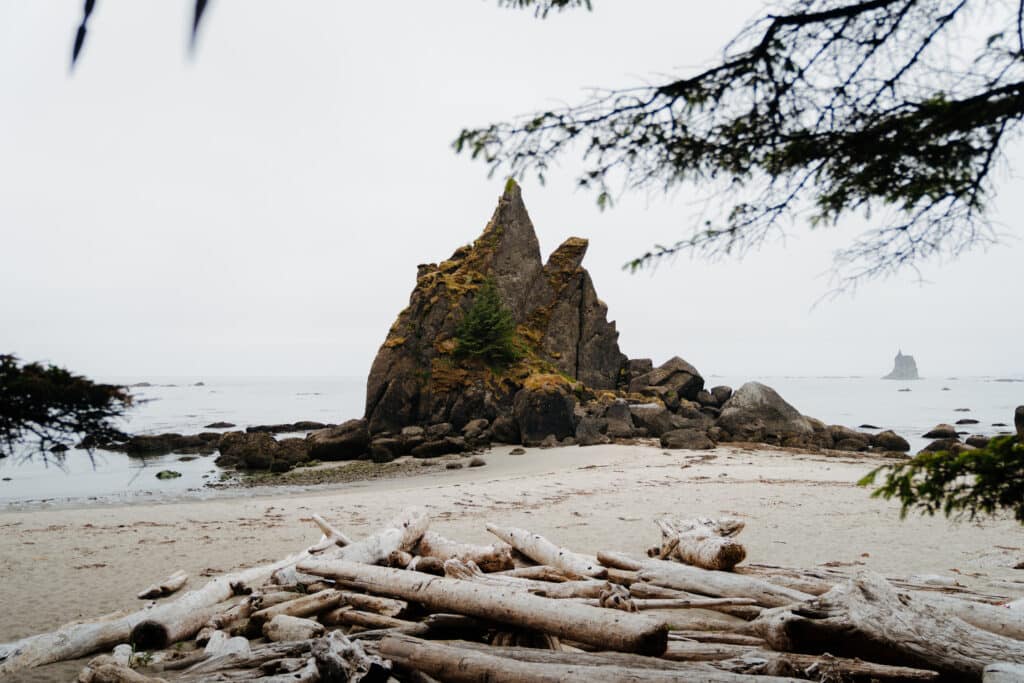
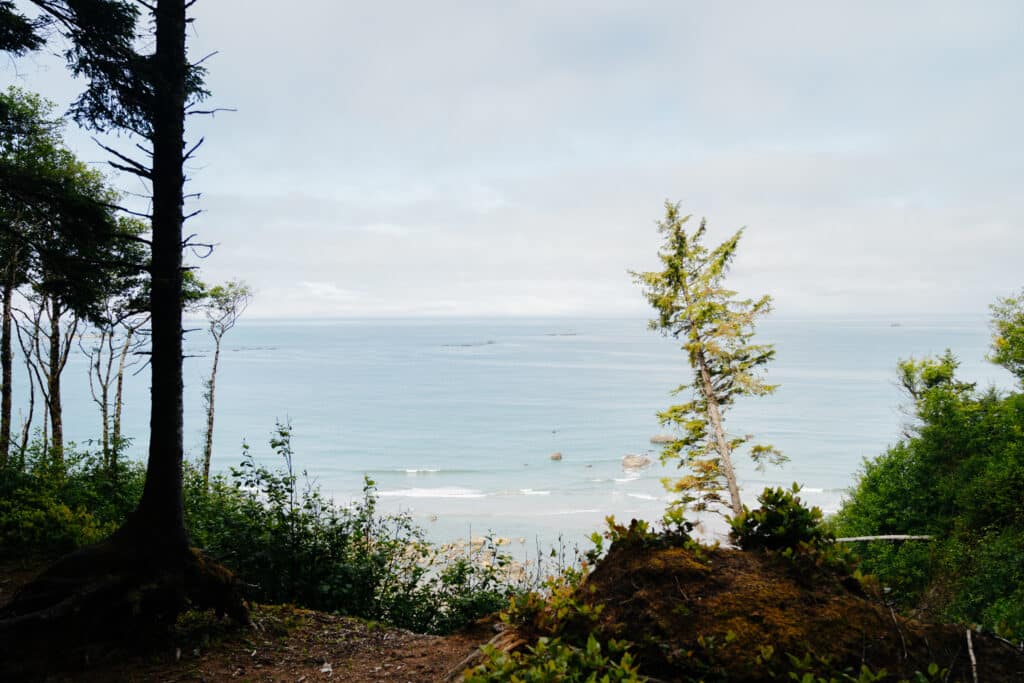
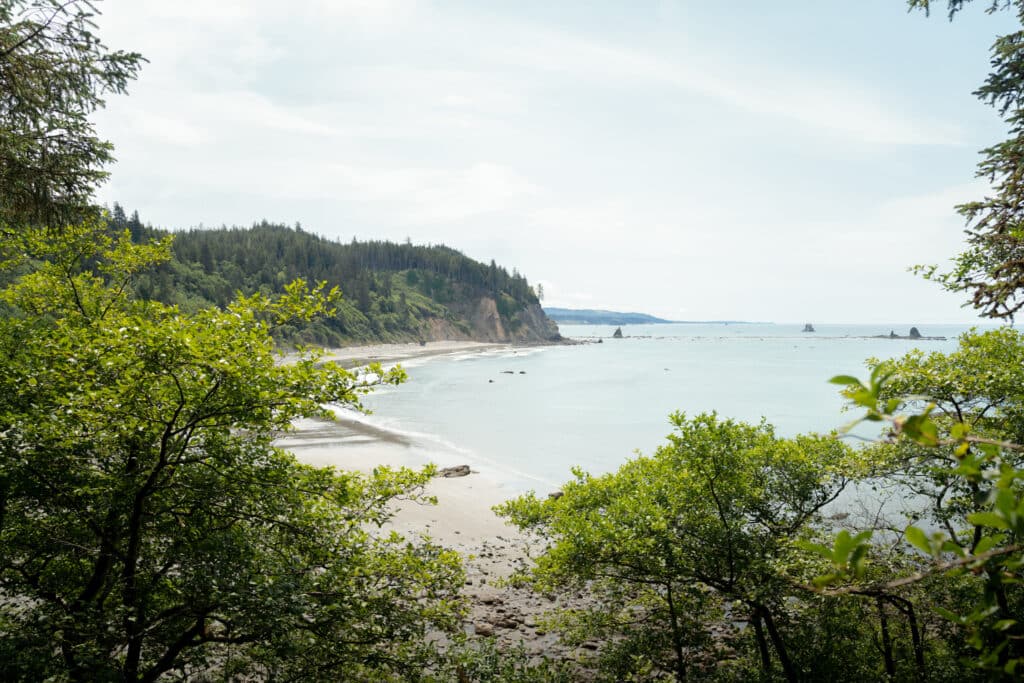
The hike begins at the Third Beach trailhead, where there’s a bathroom if you need it. Then, you’ll start walking through gorgeous greenery – your first taste of the coastal forest! The flat trail soon reaches a 200 foot descent down to the beach, and you’ll start catching glimpses of the water.
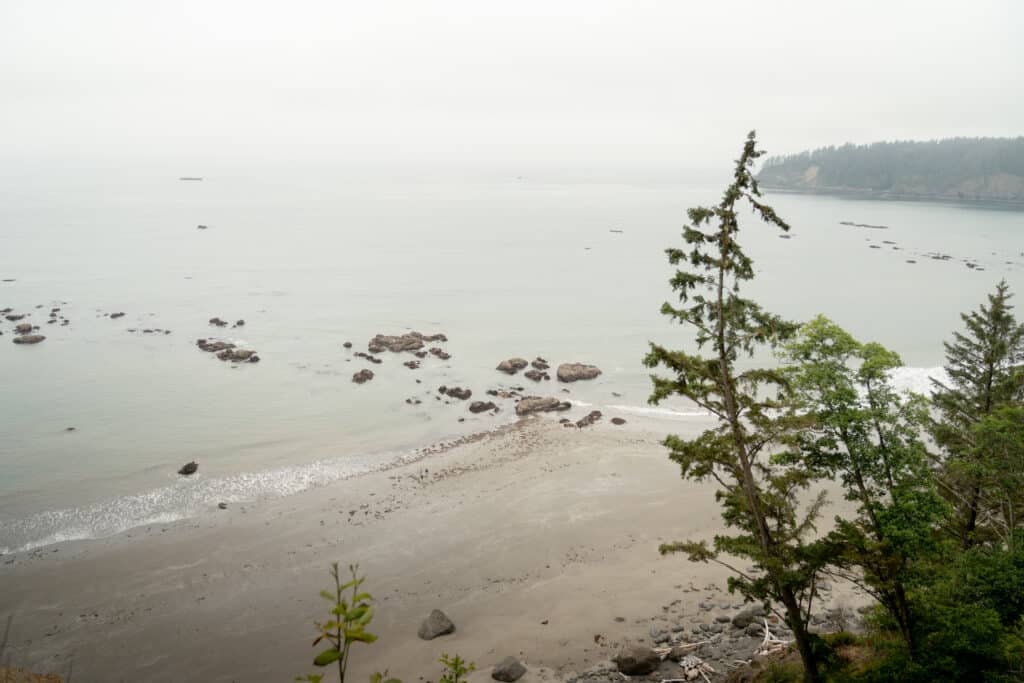
Soon, you’re at Third Beach! This is a popular place, with lots of day hikers and campers coming to enjoy the view. You’ll walk on the shore for a little bit, before having to come up to the overland trail. Throughout this hike, I recommend having a map handy – though the trail is generally easy to follow, the steep ascents to the overland trail are often easy to miss!

To get up to the overland trail, there’s a steep ladder that hangs down to the beach. You’ll climb up, using the rope to help you up the steep, slippery slope. Don’t get too excited after the first ladder is over – there are a few more! The good news is, this is the hardest part for the day. Once you’re up the ladders and on the overland trail, you’ll walk through the coastal forest for 1.25 miles, going up and down occasionally, but without any more super steep sections until it’s time to go back down to sea level.
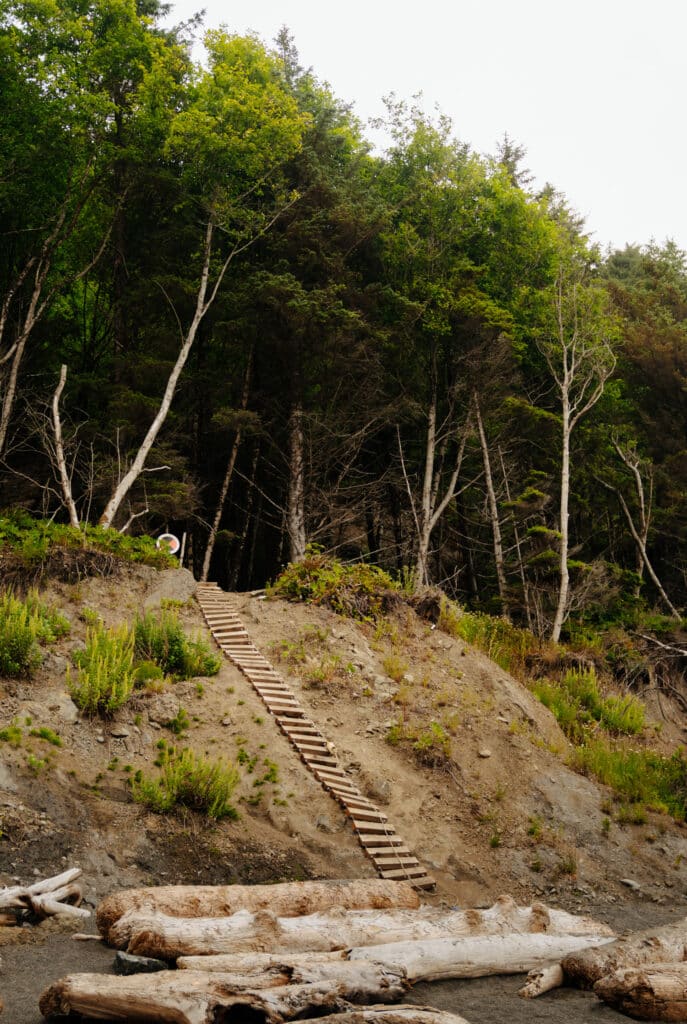
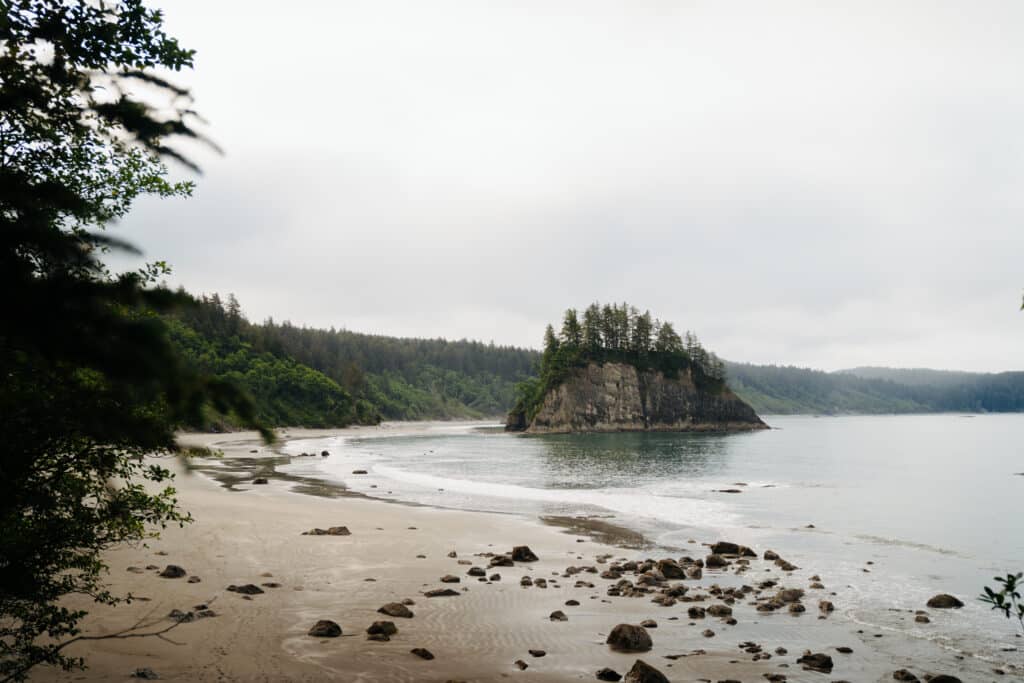
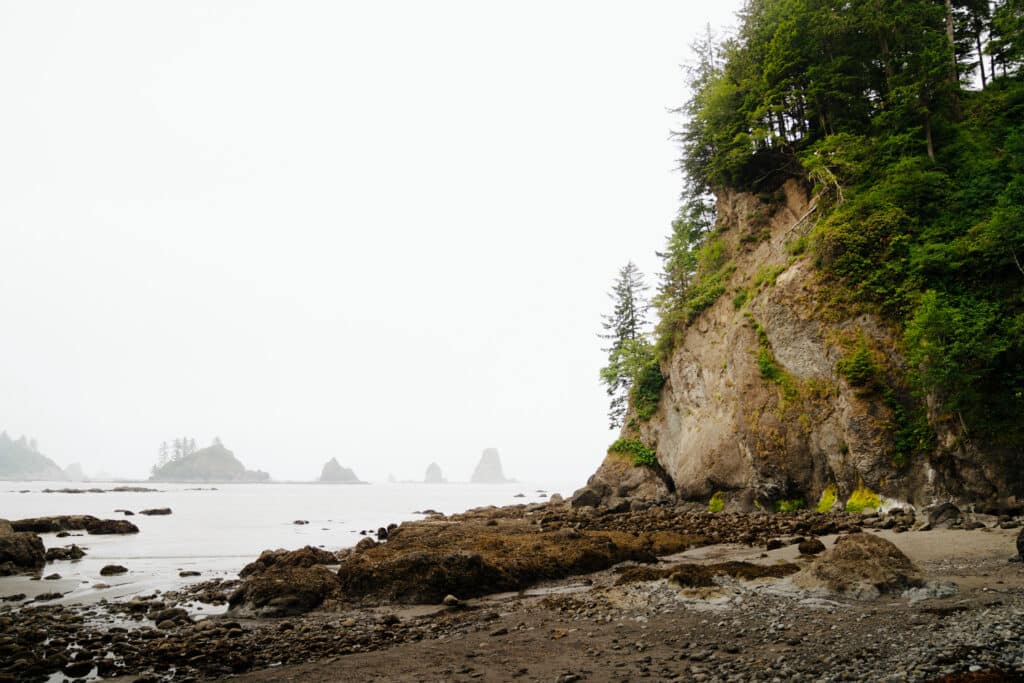
Another ladder and rope lead back down to the beach. Here, you’ll run into the first tidal restriction. During high tide, this rocky cove is underwater! The tide needs to be 4.5′ or lower, and you can continue on along the beach. There is a short, very steep overland section that you can use to get around this, but walking on the beach is much easier. Keep walking on the pebbly beach, and you’ll reach Scott’s Bluff. Here, the slope up to the overland section is hard to see. There’s just a really steep, sandy cliff side with a rope hanging down! This section is tough, but not very long. Hold onto the rope, and pull yourself up to the overland trail.
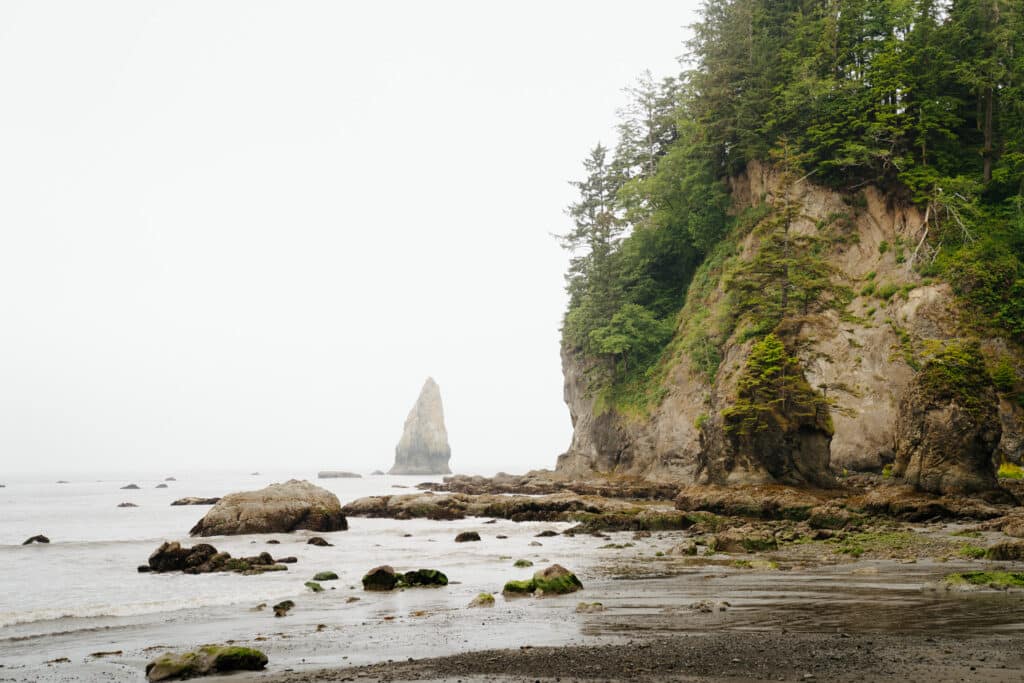
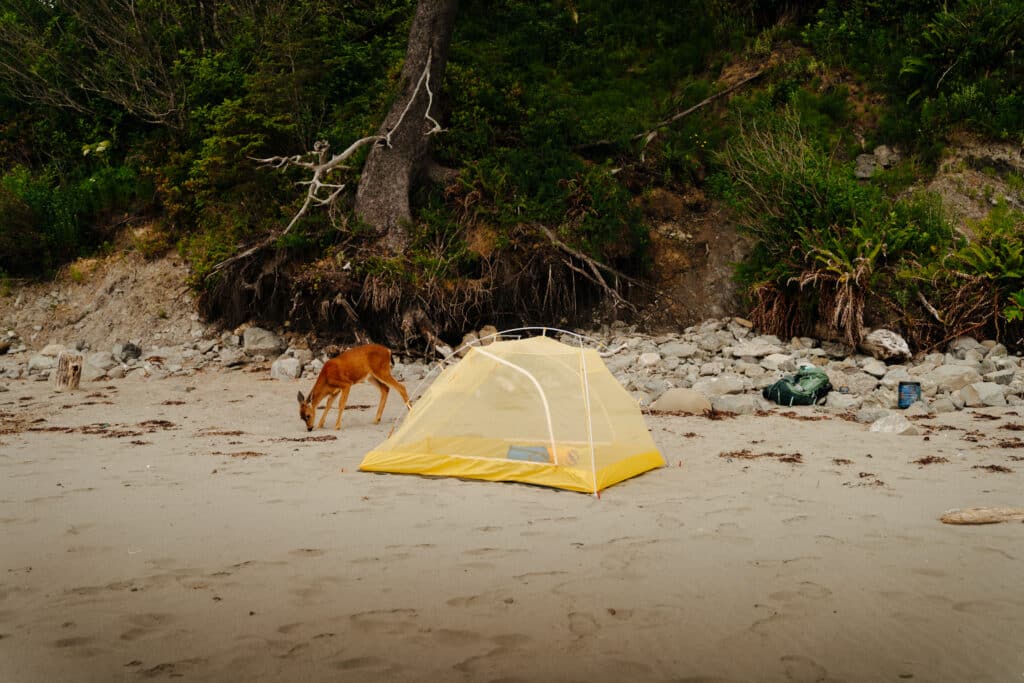
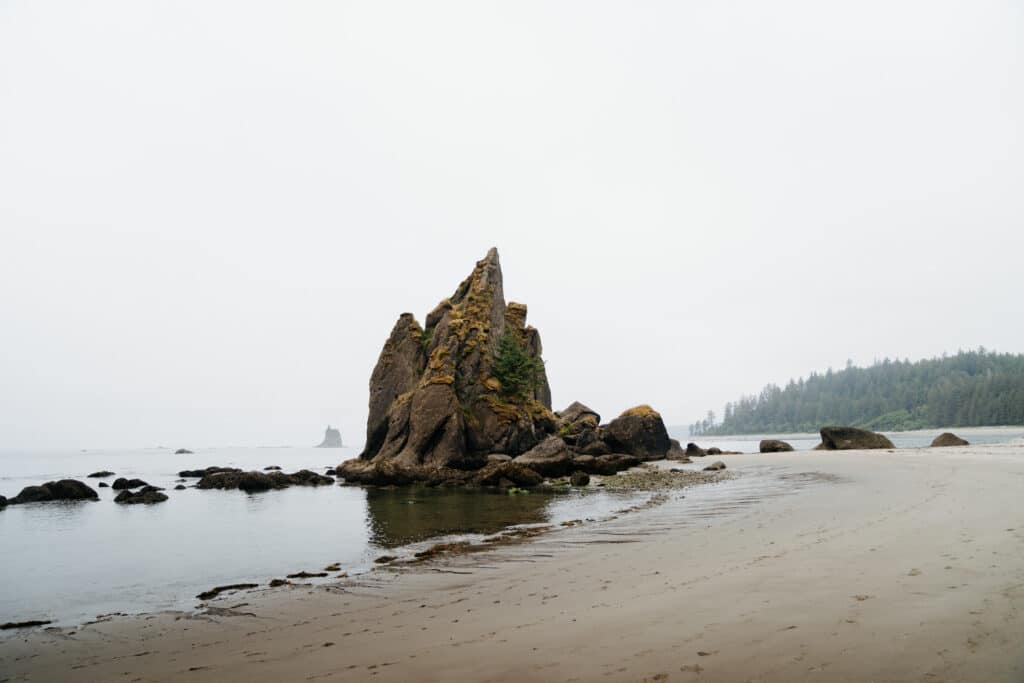
This section of overland trail is pretty short, and you’ll soon be back down next to the ocean – for the rest of the day. When you come down, you’ll be at Scott Creek – there are a few campsites here, but I recommend that you keep going to Toleak Point. Right after Scott Creek is the tidal restriction of 4′ or lower. Keep walking on the beach, and you’ll get to Toleak Point! There are a few campsites in the treeline (many of which even have a makeshift table), or you can camp on the beach.

There’s a privy on the north side of Toleak Point, and a creek for fresh water just south of it.
Set up camp, and enjoy the night!
Day Two: Toleak Point to Mosquito Creek (4.6 miles)
Waking up to the sound of the waves is absolutely magical. After you have breakfast, fill up your water bottle, and pack up camp, you’ll continue on to Mosquito Creek. You’ll walk for a mile on the beach before heading up to the overland trail again. You’ll enter the forest, and soon there will be two creeks that you need to cross.
First, Falls Creek. During high tide, ocean water can get pushed into the creek, making it deeper. It can also be a lot harder to cross if there’s been a lot of rain recently. I crossed it at mid tide, and it was just above my ankles – easy! Shortly after is Goodman Creek, which is usually ankle to knee deep, but if it’s rained a lot, it can be harder. This one was shallow for me too, but when I entered I almost slipped – so be careful of the slimy rocks!
After you’ve crossed the rivers, you’ll soon come back down to the beach. The ladder going down is kind of tough, and the trail is muddy, so be careful and hold on to the rope! Once you’re on the beach, the rest is pretty easy – 2.2 miles of walking at sea level. Mosquito Creek is a wide creek that pours into the ocean, so at high tide it gets deep and difficult to cross. You can camp on the beach right before the creek, but the official campsites (and the privy) in the tree line require you to walk across the creek, and climb up the steep slope onto the overland trail. I recommend camping on the beach!
I actually ended up doing this hike in two days (though I had planned for three) because of a… situation (a getting my period and realizing that the products I thought I had put in my backpack were actually on the table of my camper van back at the trailhead situation), but three days is definitely better, easier, and more fun!
Day Three: Mosquito Creek to Oil City Trailhead (6.1 miles)
If you camped on the beach, you’ll start this day by climbing up to the overland trail. This is the longest portion of overland trail, taking you 3.5 miles through the coastal forest to avoid the impassable cliffs and bluffs down at sea level.
This section of the South Coast Wilderness trail is also least traveled, because many people just hike out and back from Third Beach to Toleak Point. Because of this, the overland trail is more overgrown. It’s also pretty muddy. But, it’s nothing too hard to navigate, and you’ll enjoy the solitude!
The hike is pretty easy, until you get to the final descent back down to the beach. The ladder leading down from the overland trail to Jefferson Cove is old and weathered, requiring you to take big steps backwards and navigate unstable footing. It’s a challenge after hiking all those miles the days before, but soon you’ll be back at sea level. The hard part is over!


But, it’s not just a simple walk on the beach. The strictest tidal restriction is at Diamond Rock, just south of Jefferson Cove. Here, the tide needs to be 2′ or lower – so you’ll likely have a somewhat narrow window to cross. Sometimes, this section is impassible for days, so it’s super important to be prepared and know what to expect before you begin your hike. You’ll need to walk on big boulders, covered in shellfish and seaweed. It’s not too hard, but it does mean you need to watch your footing. As you walk, you can see crabs scurrying around and lots of marine life in the tide pools! After you get through this section, you’ll walk on the beach for a little bit before the rocks start up again – smaller this time, but you’ll be walking on them a while longer.
Two miles south of Jefferson Cove, you’ll reach the mouth of the Hoh River – make sure you don’t walk too far on the beach – you’ll need to climb up over the driftwood on the beach to see the river. Keep an eye on your map, because I missed where the trail went into the forest! But, walk along the north side of the Hoh River (the south side is tribal land, and it’s not possible to cross the Hoh River to get back). Just 0.6 miles longer, and you’ll be back at the Oil City trailhead!
More Adventures Nearby
Have you hiked this trail, or are you adding it to your bucket list? Let me know in a comment below!
For more adventures on the Olympic Peninsula, the Lake Angeles trail is a great easy place to backpack to. For more of a challenge, do the 35 mile Hoh River trail to Blue Glacier! And if you’re feeling a day hike, Mount Storm King is one of the most beautiful places in the park, or you can walk the easy Staircase Rapids Loop.
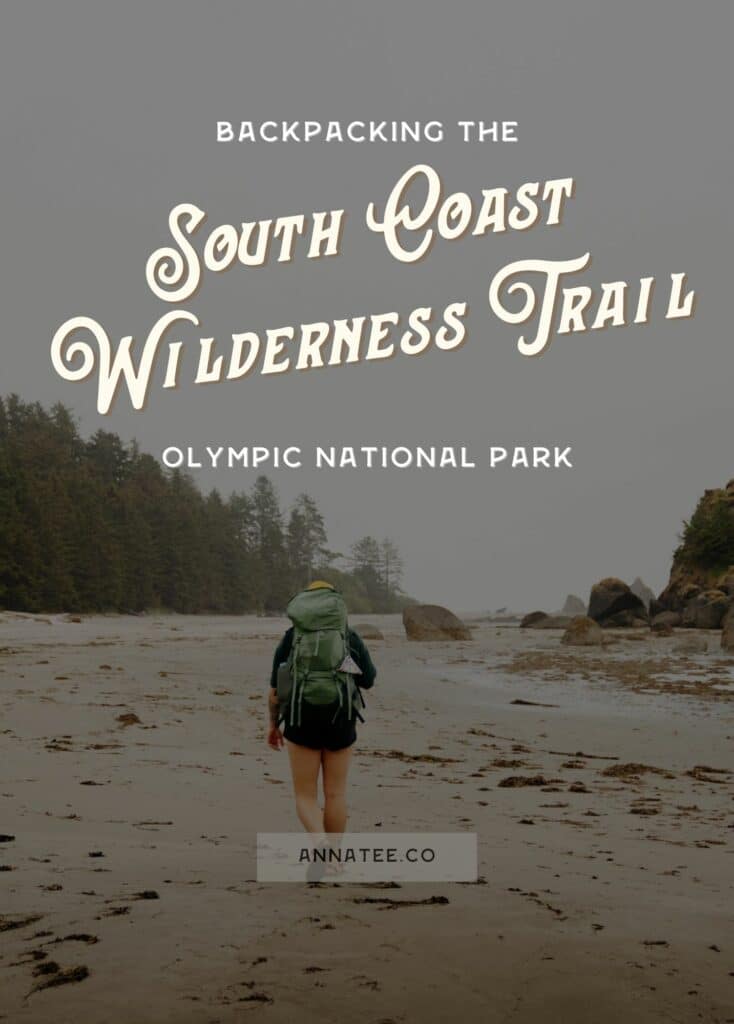
Pin any of these photos to save this guide to Backpacking the South Coast Wilderness trail for later!
It was so nice to meet you on this trip! It was really fun to read your blog about the trip! It would have been so nice to have before planning our adventure 🙂 You are so detailed I can’t wait read about more of your adventures!
Aw hi!! So nice to meet you all too! Thanks so much for reading 🧡